Add an admin account
In Microsoft Entra External ID, a customer tenant represents your directory of consumer and guest accounts. With an administrator role, work and guest accounts can manage the tenant.
Prerequisites
Before you start make sure you have configured the following:To add an admin account, sign in to the Microsoft Entra admin center with Global Administrator or Privileged Role Administrator permissions and browse to Identity > Users > All users. Then, select New user > Create new user.

On the Create new user page, under basics, enter information for this admin: User principal name (Required). The user name of the new user. For example, emily@woodgrovelive.com. Eneter a Name. Copy the autogenerated password provided in the Password box. You'll need to give this password to the admin to sign in for the first time.
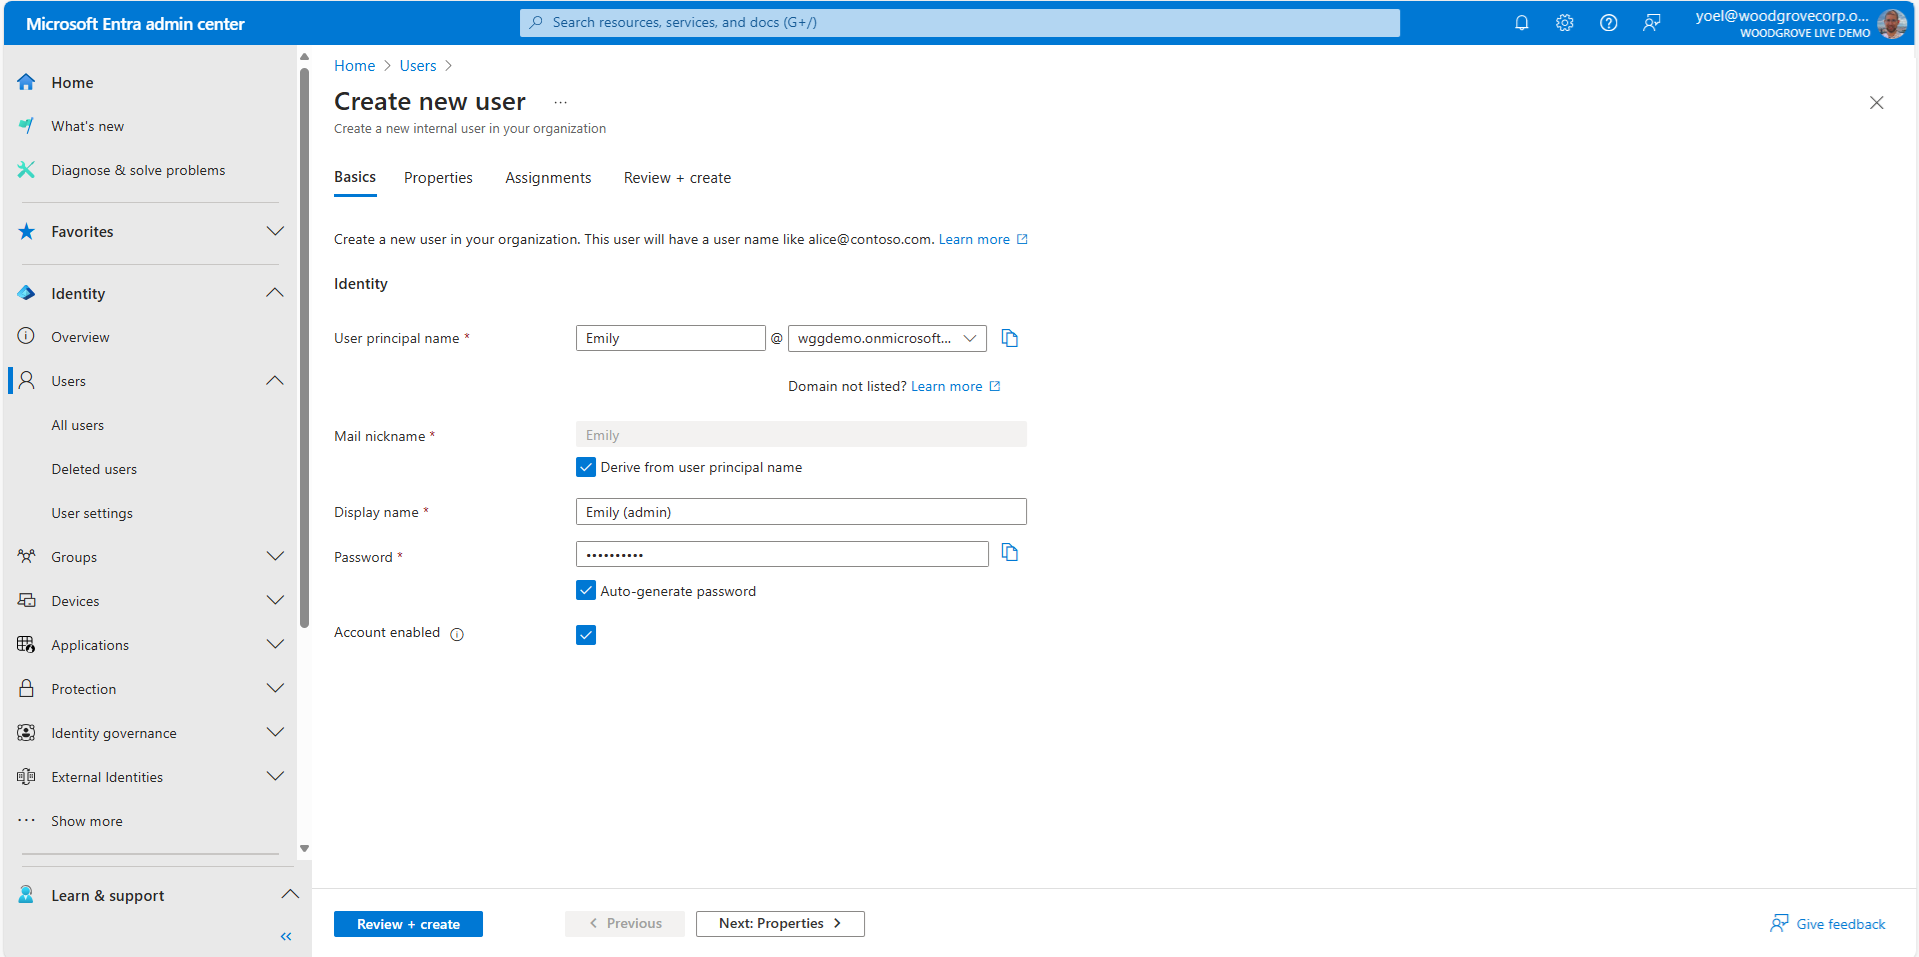
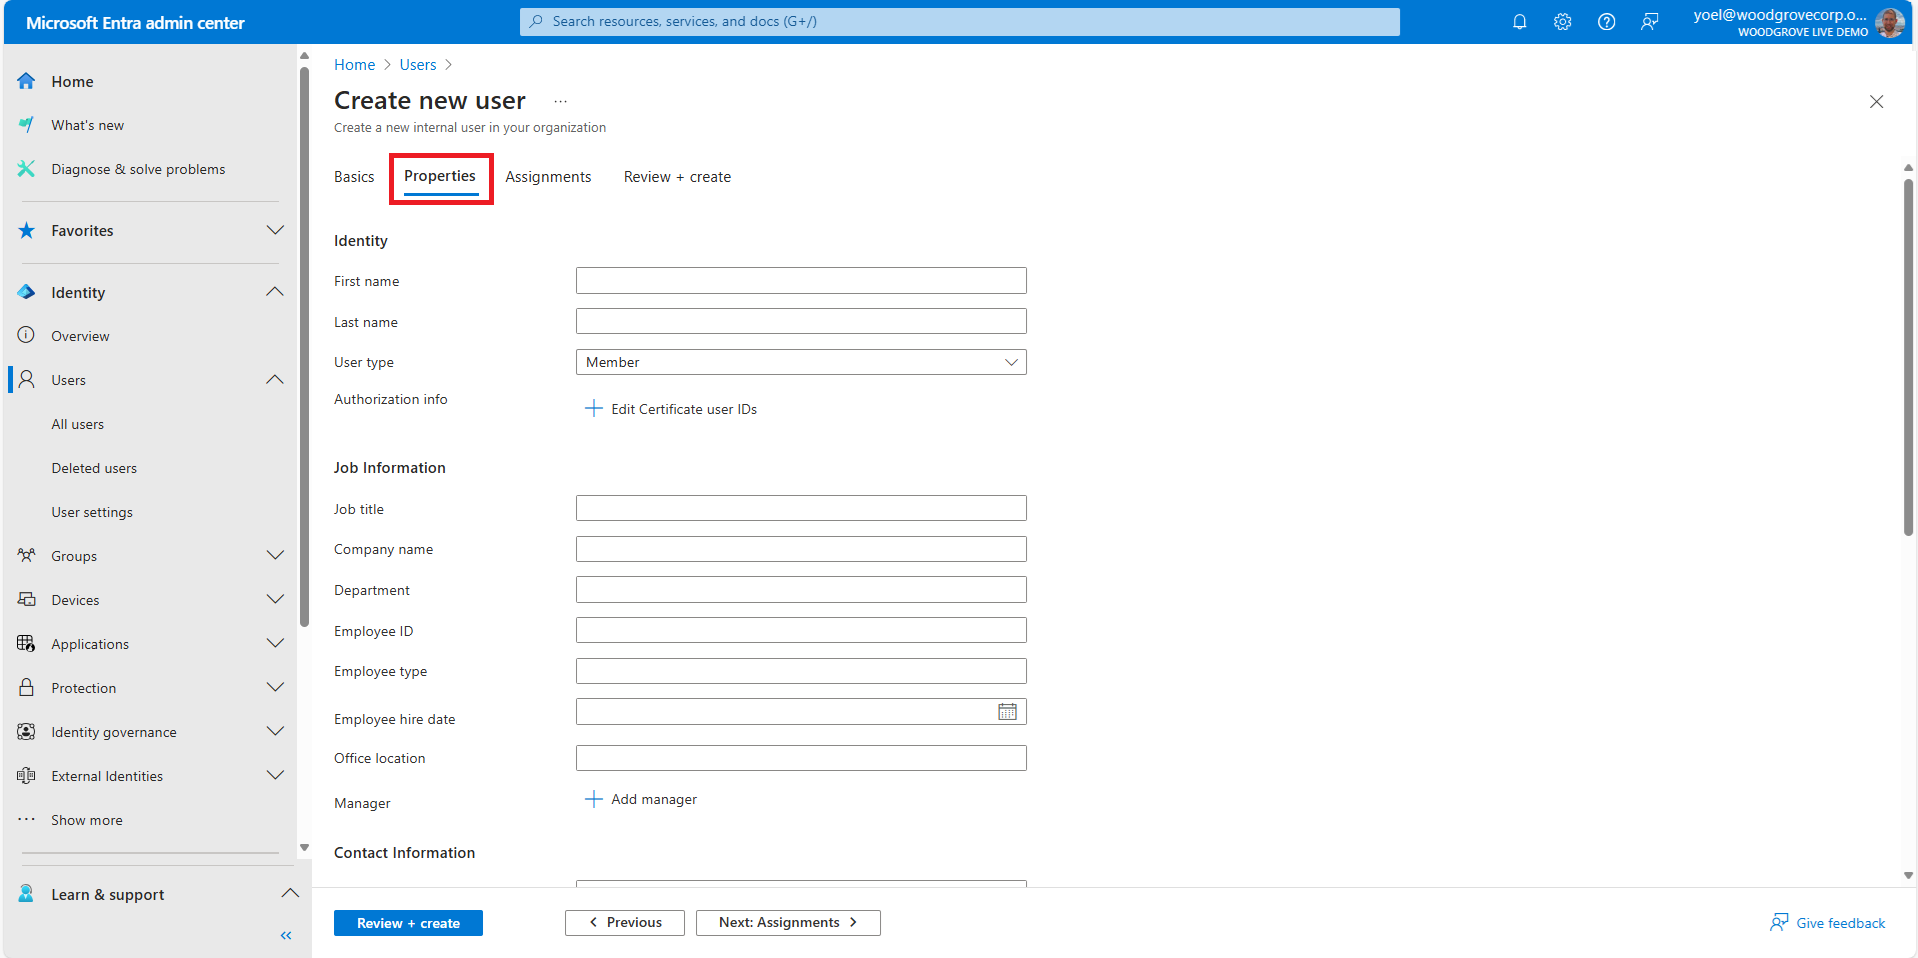
Under Properties, you can also enter a First name and Last name along with some other properties.
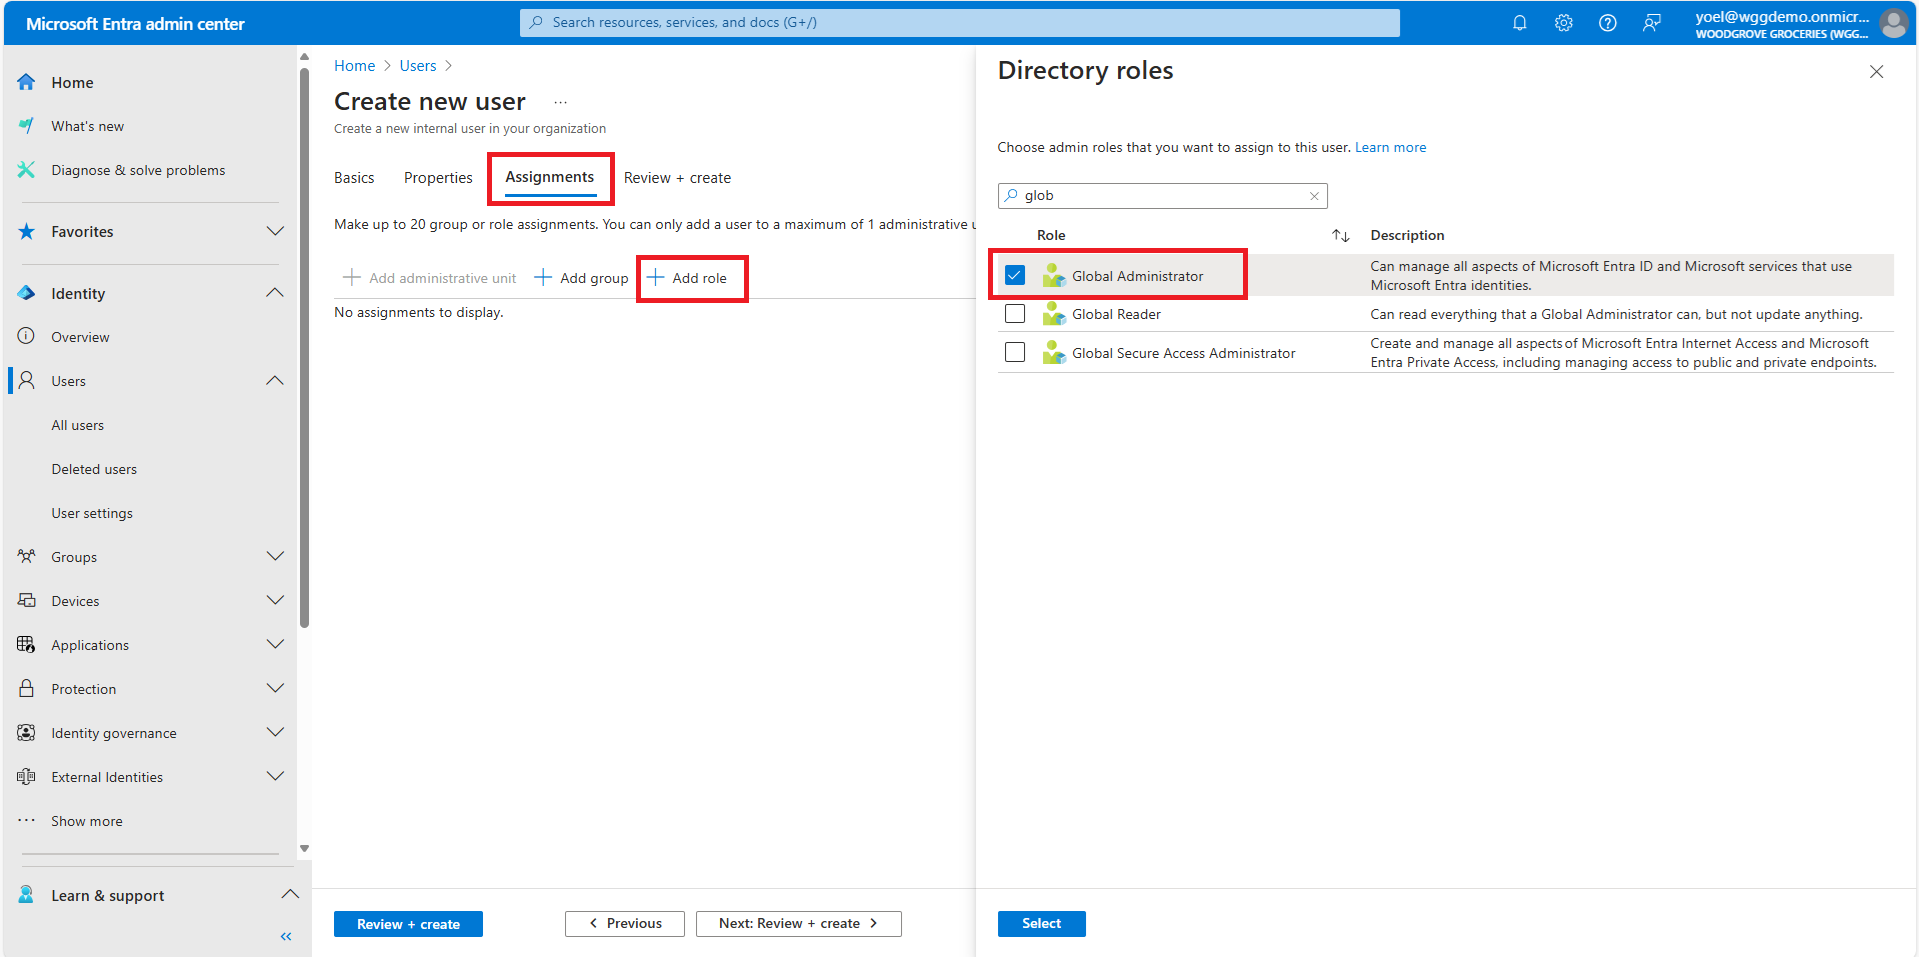
To add administrative permissions for the user, add them to a Microsoft Entra role. You can assign the user to be a Global Administrator or one or more of the limited administrator roles in Microsoft Entra ID. Under Assignments, and select Add role. Then, find the role you want to add, and choose Select.
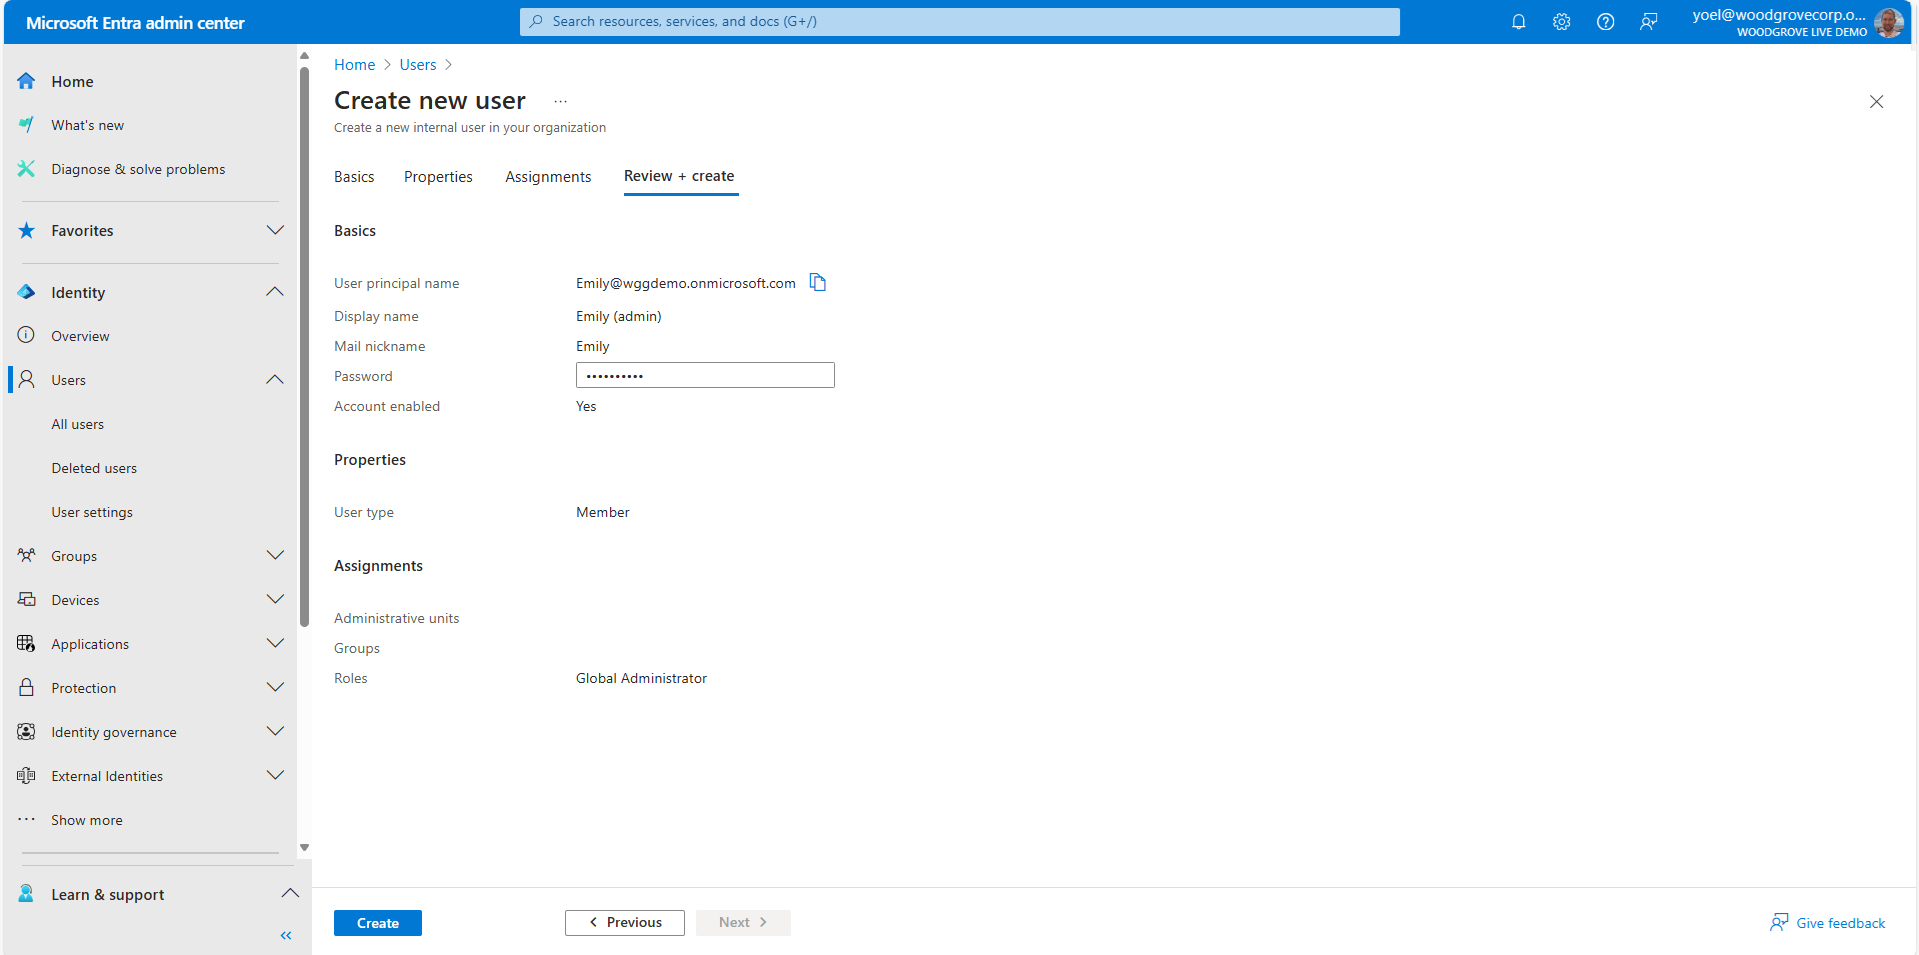
To create the account, select Create.
Well done!
The admin is created and added to your customer tenant. It's preferable to have at least one admin account native to your customer tenant assigned the Global Administrator role. This account can be considered a break-glass account or emergency access account.
Dependencies
This script is self-contained.1. Create a user
- {DisplayName} with the user display name.
- {MailNickname} with a mail alias for the user. This property must be specified when a user is created.
- {UserPrincipalName} with the principal name (UPN) of the user. The general format is alias@domain, where the domain must be present in the tenant's collection of verified domains.
- {Password} with a temporary password that you will share with the user. During the first sign-in, the user will be asked to change their password.
POST https://graph.microsoft.com/v1.0/users
Connect-MgGraph -Scopes "User.ReadWrite.All"
{
    "accountEnabled": true,
    "displayName": "{DisplayName}",
    "mailNickname": "{MailNickname}",
    "userPrincipalName": "{UserPrincipalName}",
    "passwordProfile": {
        "forceChangePasswordNextSignIn": true,
        "password": "{Password}"
    }
}
New-MgBetaUser -BodyParameter $paramsPOST https://graph.microsoft.com/v1.0/users
{
    "accountEnabled": true,
    "displayName": "Adele Vance",
    "mailNickname": "AdeleV",
    "userPrincipalName": "AdeleV@woodgrove.onmicrosoft.com",
    "passwordProfile": {
        "forceChangePasswordNextSignIn": true,
        "password": "xWwvJ]6NMw+bWH-d"
    }
}
New-MgBetaUser -BodyParameter $params1.1 Copy the user ID
From the response, copy the value of the id. For example:
{
    "@odata.context": "https://graph.microsoft.com/v1.0/$metadata#users/$entity",
    "id": "11111111-0000-0000-0000-000000000000",
    ...
}
| DisplayName | Id | UserPrincipalName |
| Adele Vance | 11111111-0000-0000-0000-000000000000 | AdeleV@woodgrove.onmicrosoft.com |
2. Assign admin role
After the new user is created, create a (unified) role assignment. In the following Graph, replace the:
- {user-id} with the user id from the previous step.
- {role-id} with one of the Microsoft Entra built-in roles.
POST https://graph.microsoft.com/v1.0/roleManagement/directory/roleAssignments
Connect-MgGraph -Scopes "RoleManagement.ReadWrite.Directory"
{
    "principalId": "{user-id}",
    "roleDefinitionId": "{role-id}",
    "directoryScopeId": "/"
}
New-MgRoleManagementDirectoryRoleAssignment -BodyParameter $paramsPOST https://graph.microsoft.com/v1.0/roleManagement/directory/roleAssignments
{
    "principalId": "11111111-0000-0000-0000-000000000000",
    "roleDefinitionId": "62e90394-69f5-4237-9190-012177145e10",
    "directoryScopeId": "/"
}
New-MgRoleManagementDirectoryRoleAssignment -BodyParameter $params