Create a tenant
Microsoft Entra External ID offers a customer identity access management (CIAM) solution that lets you create secure, customized sign-in experiences for your customer-facing apps and services. You'll need to create a tenant with customer configurations in the Microsoft Entra admin center to get started. Once the tenant with customer configurations is created, you can access it in both the Microsoft Entra admin center and the Azure portal.
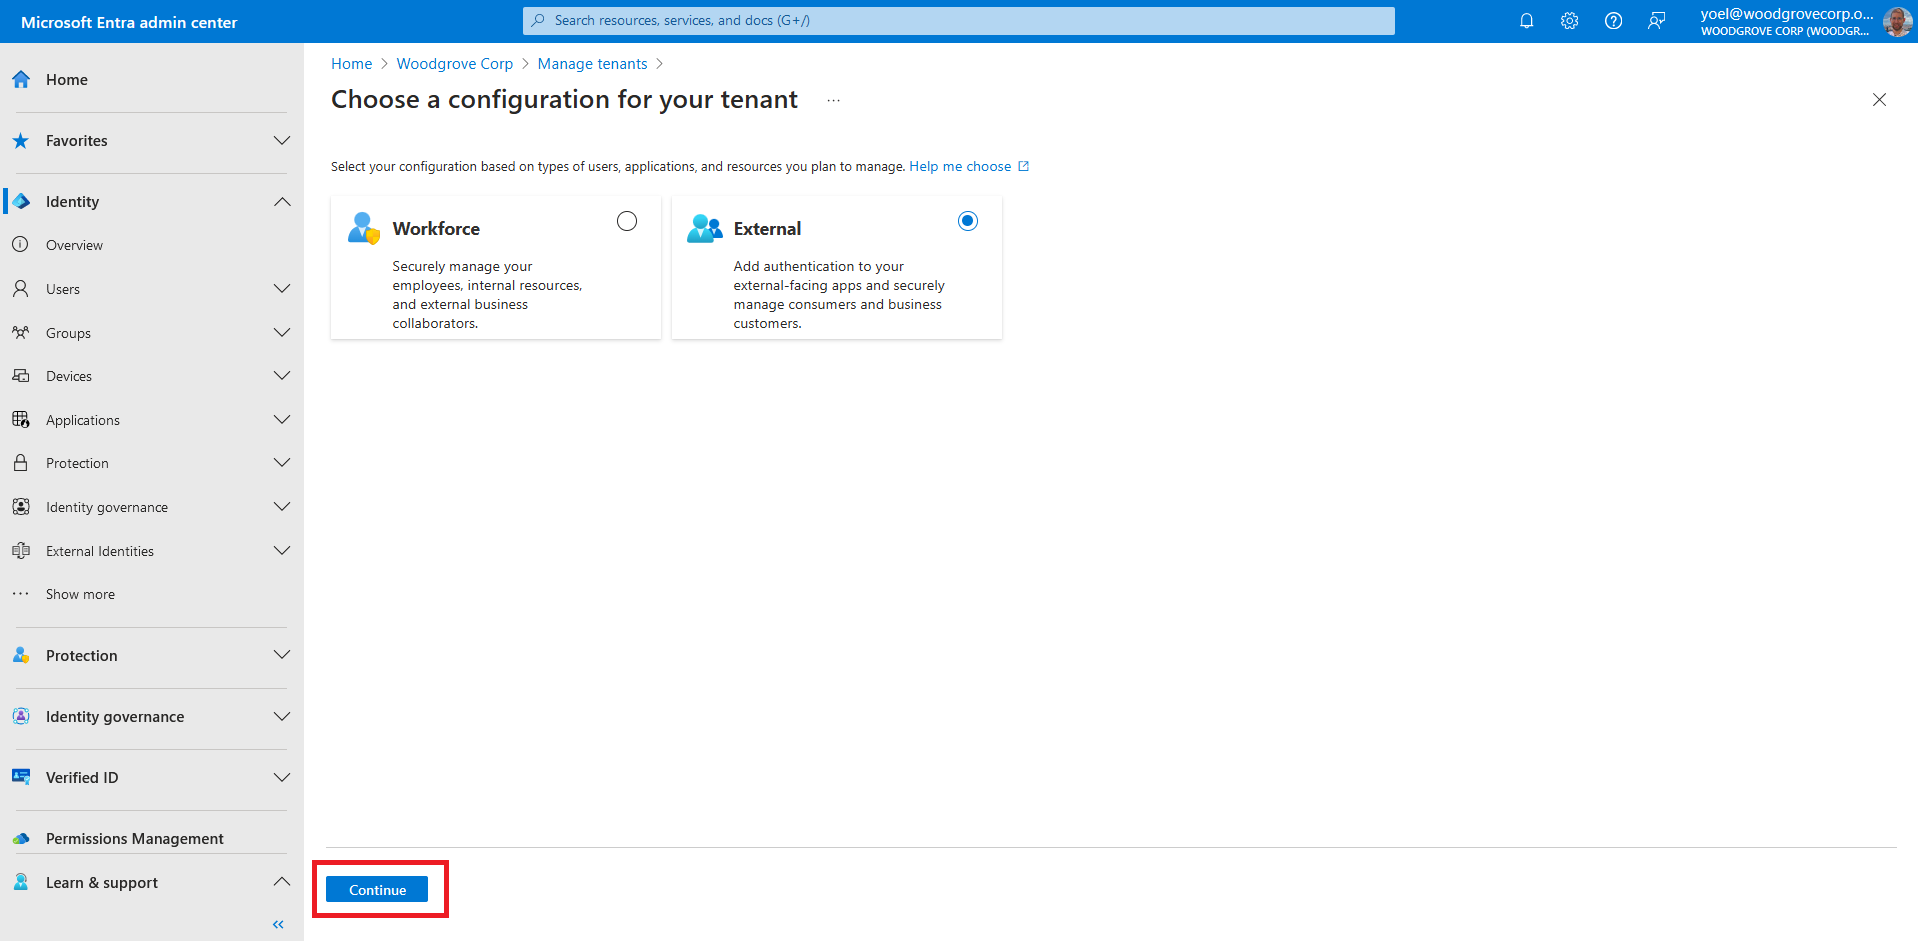
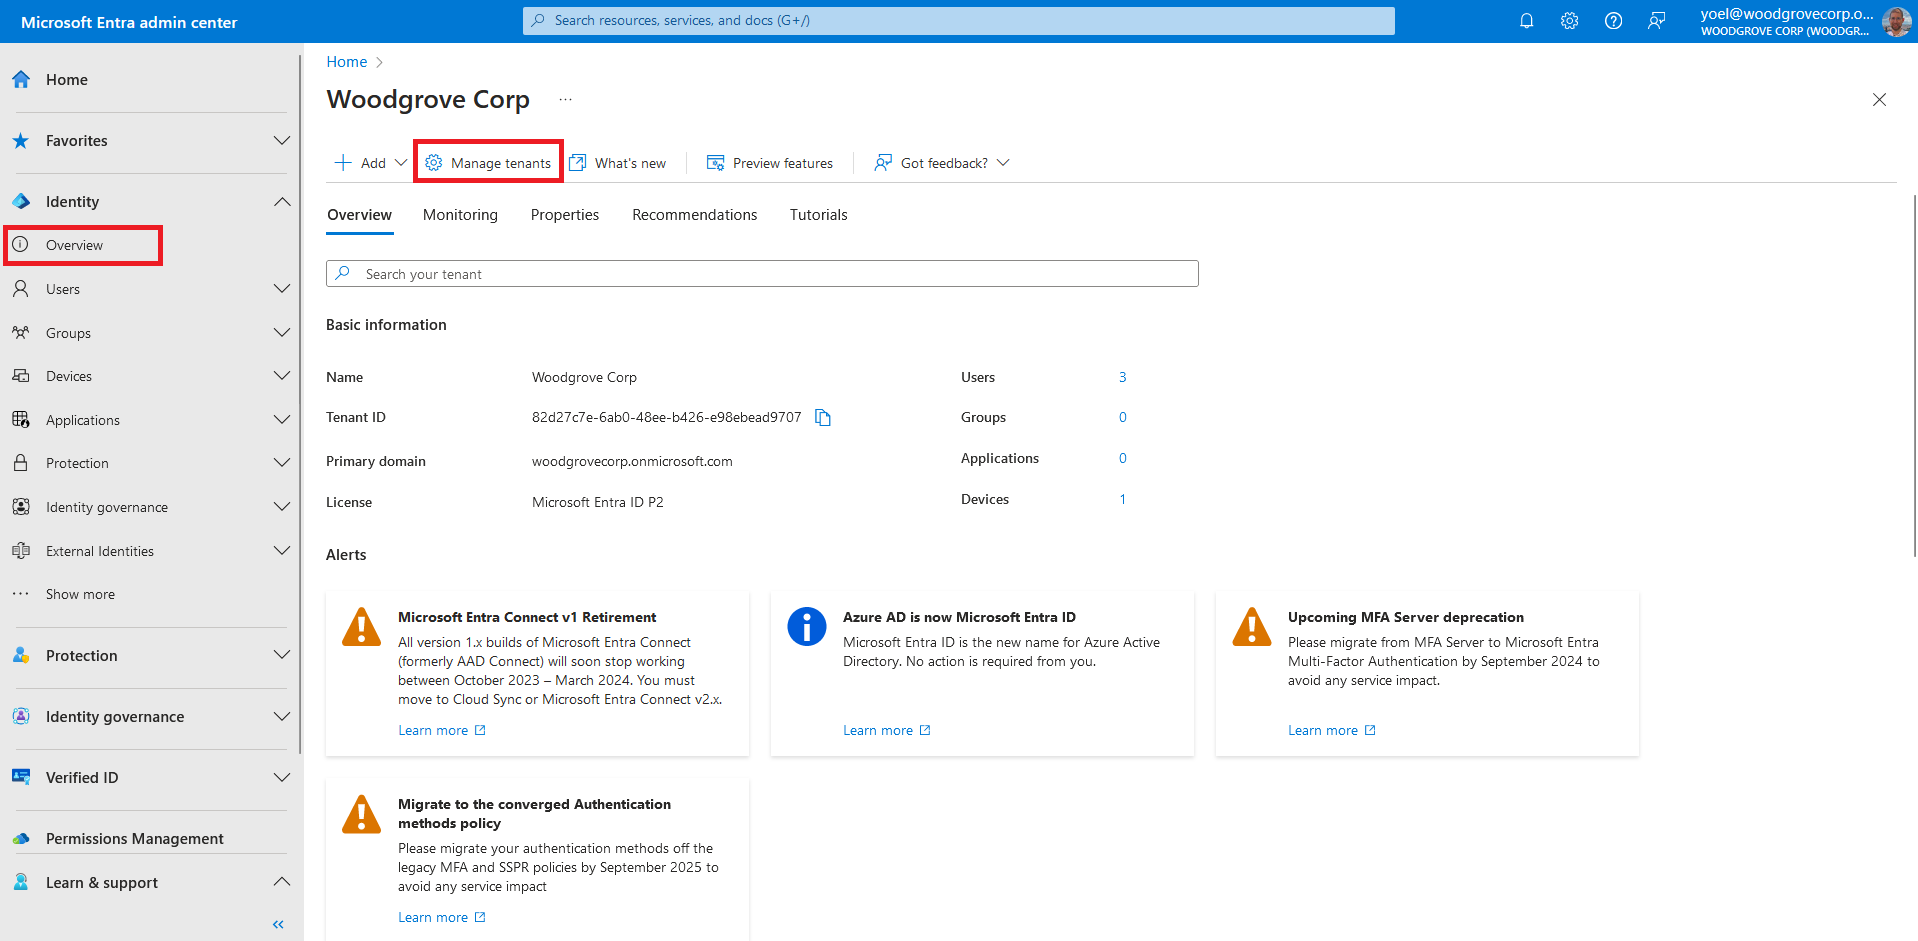
To create a tenant, sign in to the Microsoft Entra admin center and browse to Identity > Overview . Then, select Manage tenants.
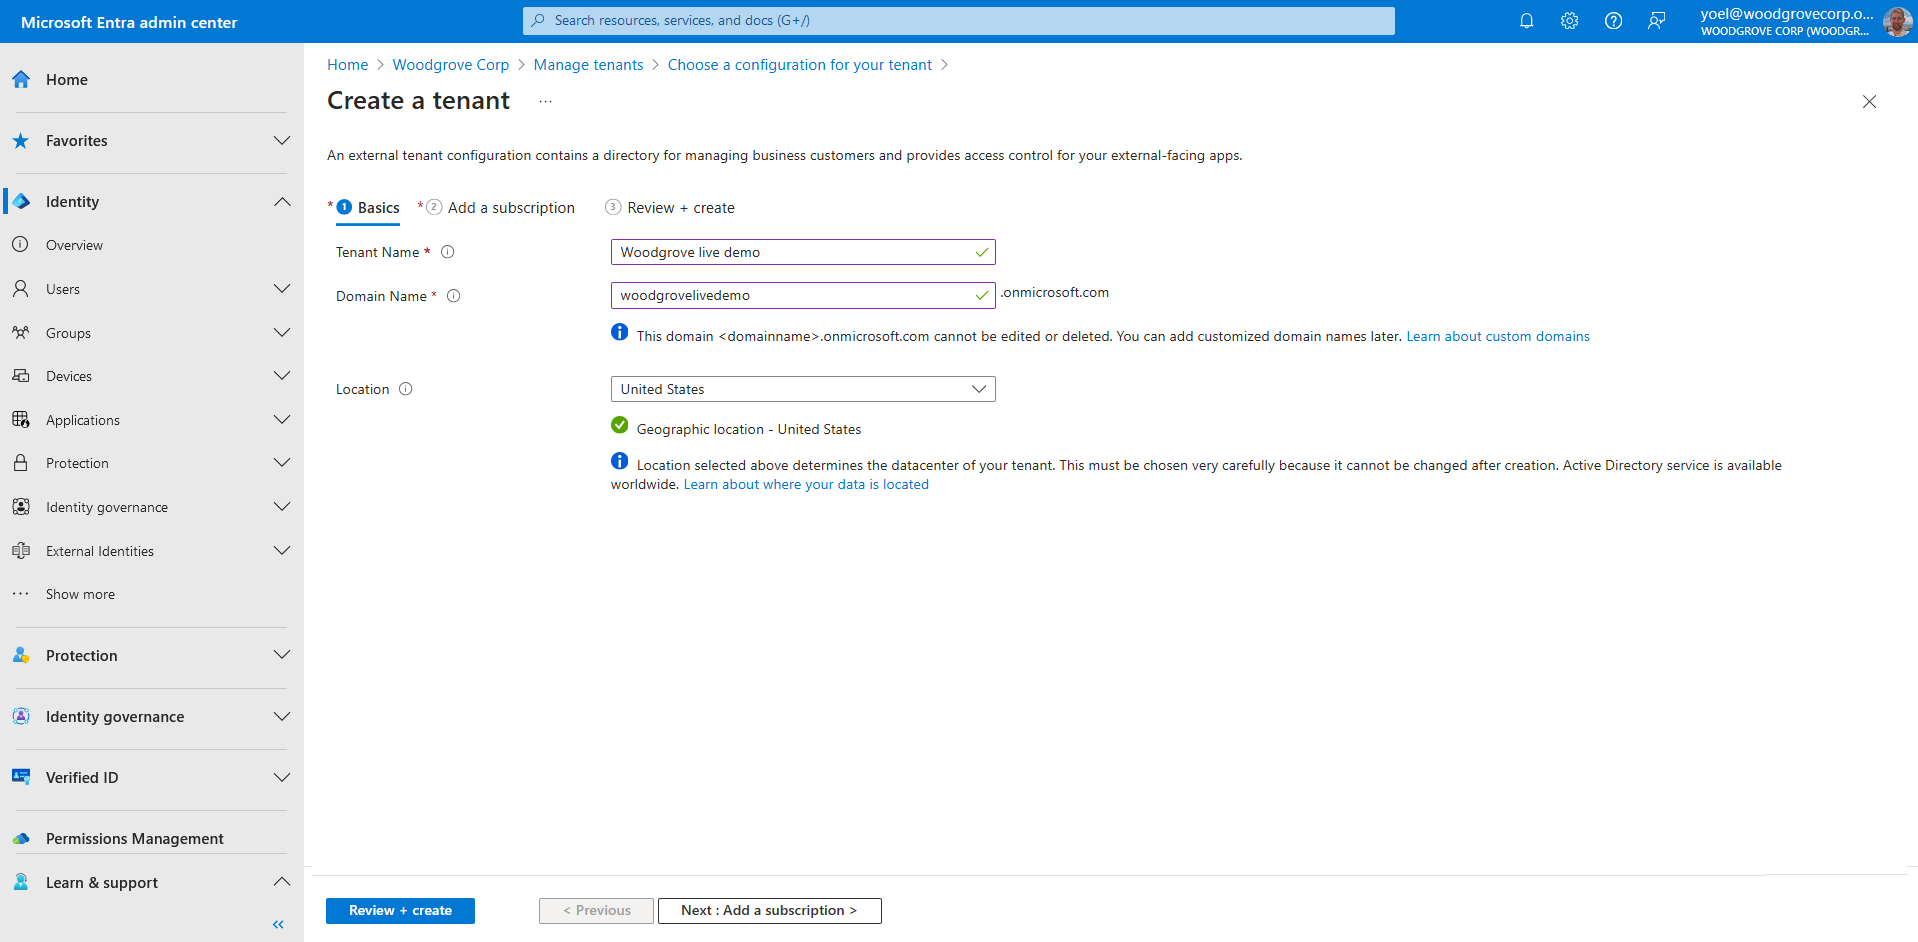
On the Basics tab, in the Create a tenant for customers page, enter the following information: Type your desired Tenant Name (for example Woodgrove live demo). Type your desired Domain Name (for example woodgrovelive). Select your desired Location. This selection can't be changed later. Then, select Next: Add a subscription.
On the Add a subscription tab, enter the following information: Next to Subscription, select your subscription from the menu. Next to Resource group, select a resource group from the menu. If there are no available resource groups, select Create new, add a name, and then select OK. If Resource group location appears, select the geographic location of the resource group from the menu. Then, select Review + Create.
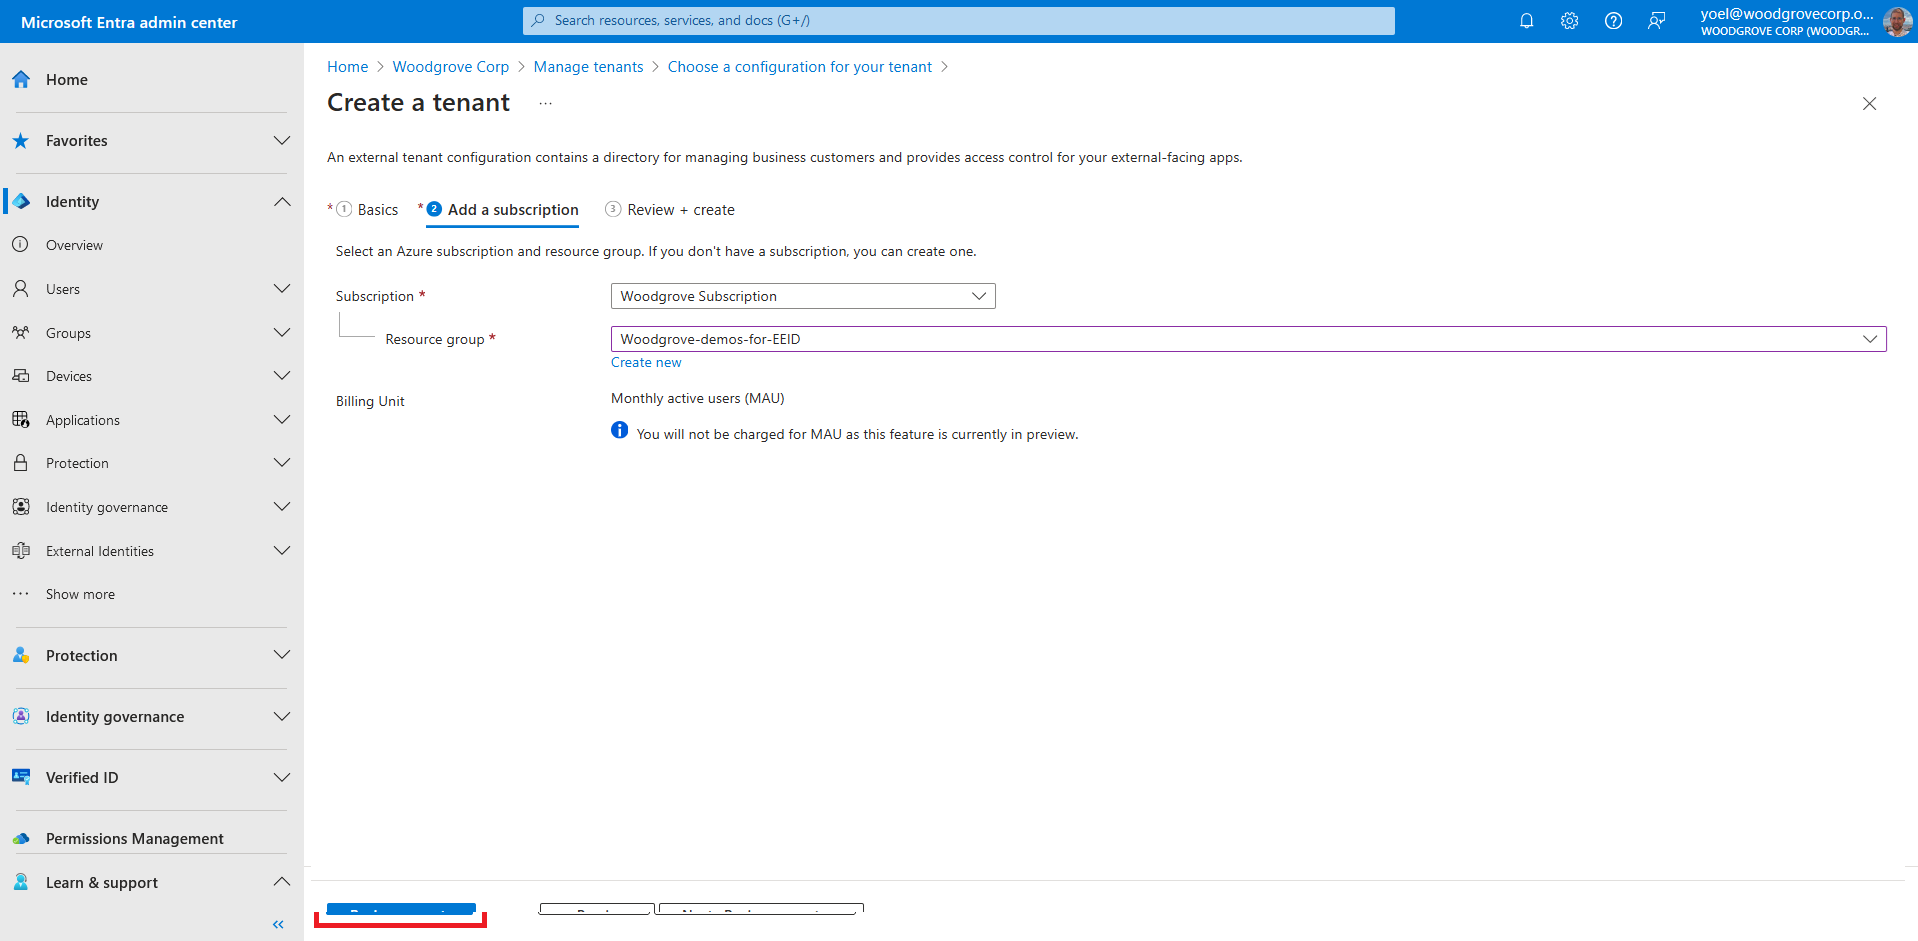
If the information that you entered is correct, select Create. The tenant creation process can take up to 30 minutes.
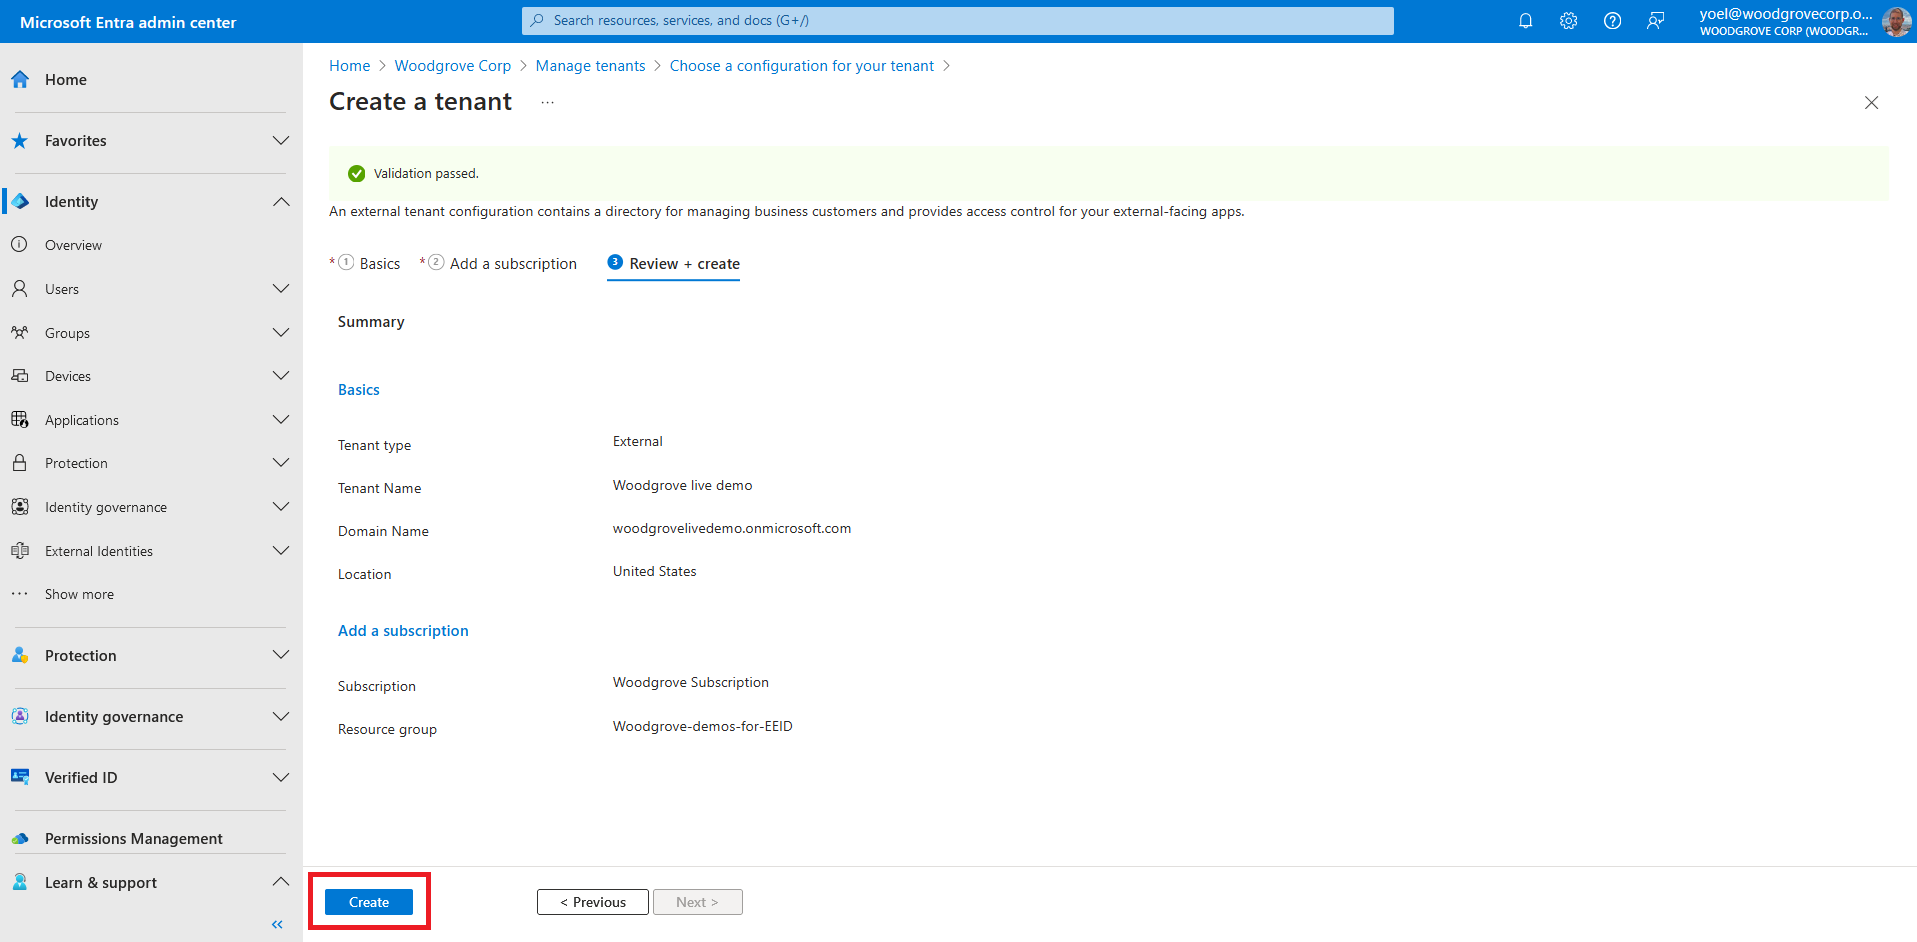
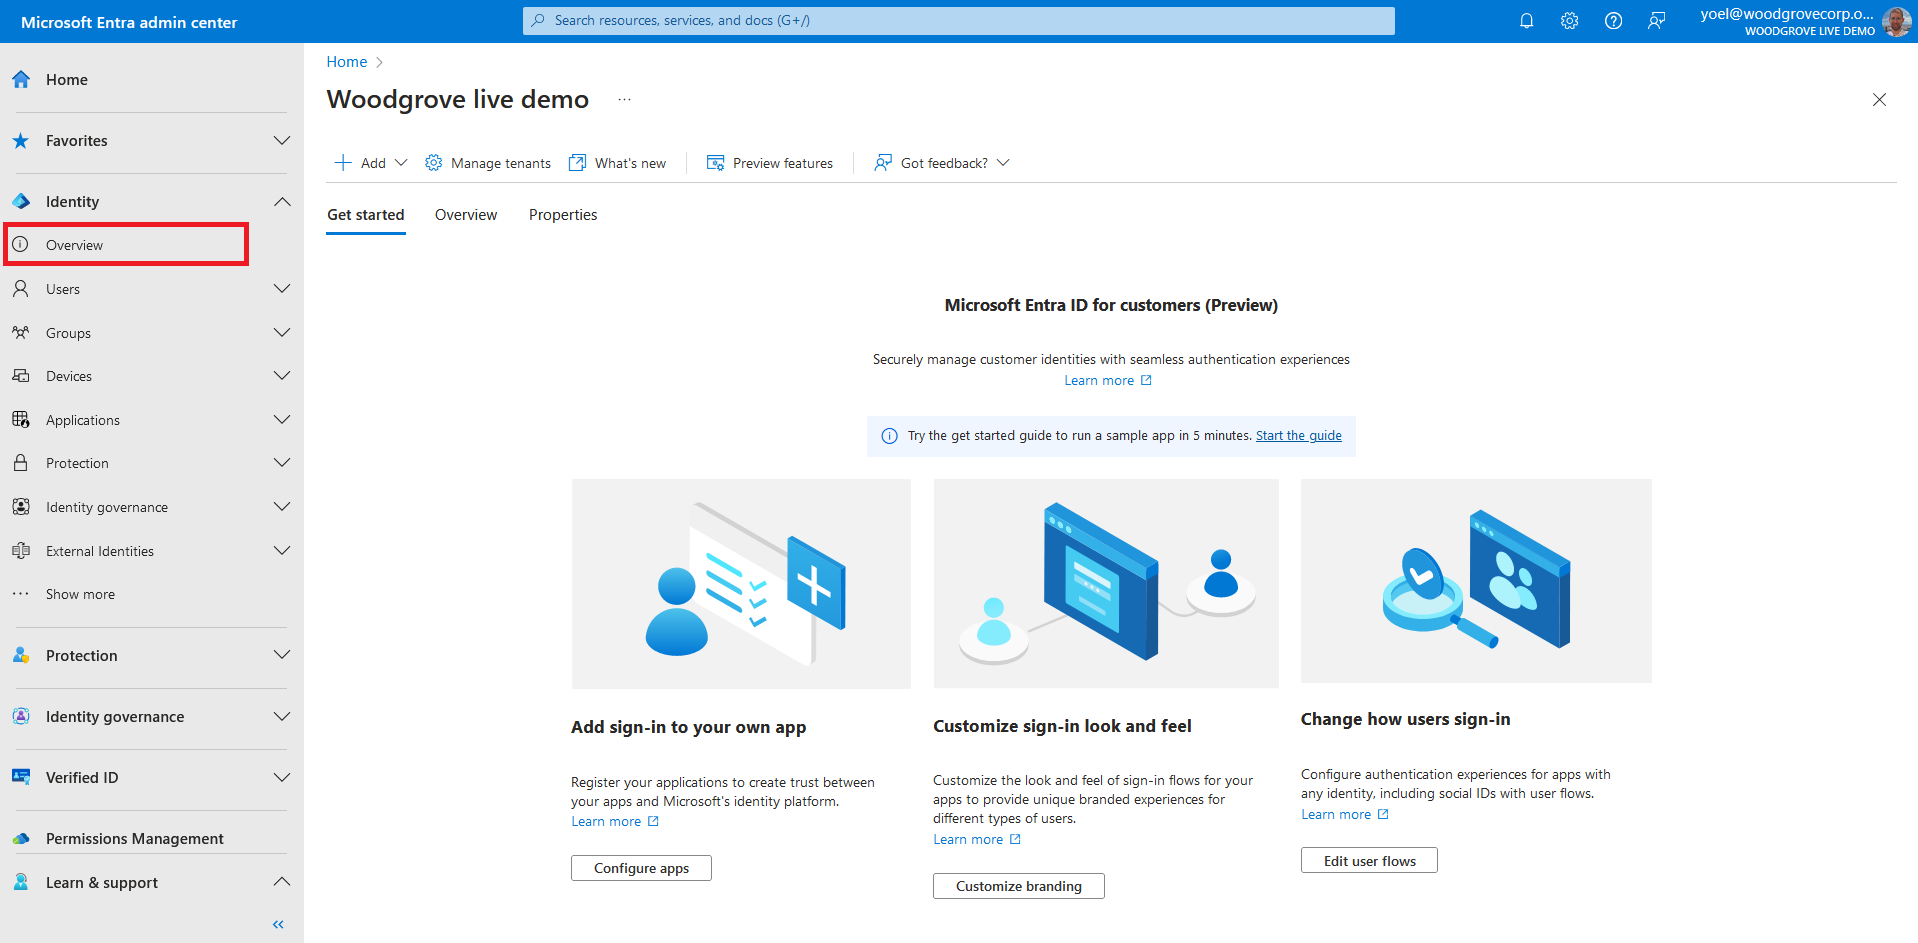
You can monitor the progress of the tenant creation process in the Notifications pane. Once the tenant is created, you can access it in both the Microsoft Entra admin center and the Azure portal.
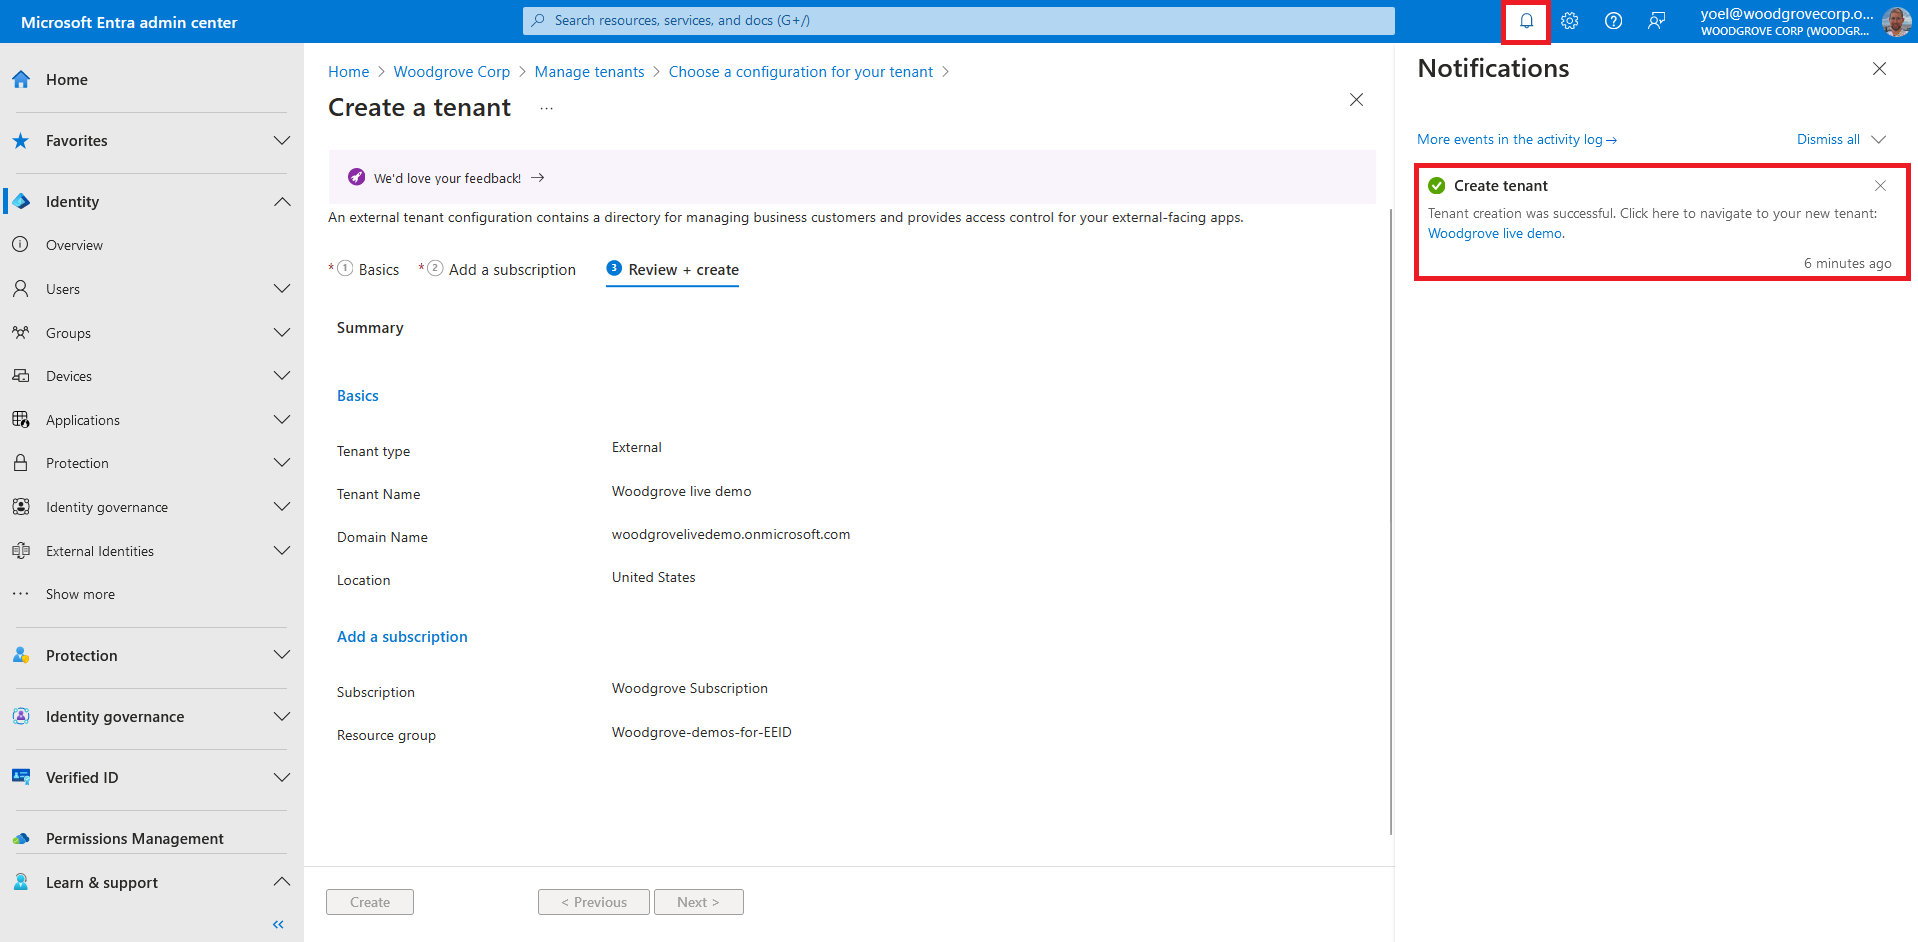
Use the Settings icon in the top menu to Switch to your customer tenant you created from the Directories + subscriptions menu. If the tenant you created doesn't appear in the list, refresh the page (using the web browser refresh button).
Well done!
At this point, the Microsoft Entra External ID tenant is ready to use. Now it's time to add your colleagues and grant them access to mange your tenant.
To continue, learn how to add administrators
Dependencies
You must have an Azure Subscription.Using Azure REST API
Before you start, please notice that for creating a tenant you use Azure REST API and not Microsoft Graph.
Check out the links to the relevant documentation. The document allows you to run the REST API directly from
your browser without the need to develop and register and application.
The following screenshot shows how to run a particular API.

1. Check Name Availability
Before you create a new tenant check the availability and validity of a domain name for the tenant. Run the following Azure REST API and replace:
- {subscriptionId} with your Azure subscription ID.
- {tenan-name} with the name of the tenant you want to check. For example, woodgorve.
POST https://management.azure.com/subscriptions/{subscriptionId}/providers/Microsoft.AzureActiveDirectory/checkNameAvailability?api-version=2023-05-17-preview
{
    countryCode: "US",
    name: "{tenan-name}"
}
Show example
POST https://management.azure.com/subscriptions/12345678-0000-0000-0000-000000000000/providers/Microsoft.AzureActiveDirectory/checkNameAvailability?api-version=2023-05-17-preview
{
  "name": "woodgrove",
  "countryCode": "US"
}
1.1 Check the response
Check the nameAvailable and the message. The following example shows unavailable tenant name:
{
  "nameAvailable": false,
  "reason": "AlreadyExists",
  "message": "The given domain name is not available."
}
The following example shows an available tenant name:
{
  "nameAvailable": true,
  "reason": null,
  "message": null
}
2. Create a resource group
To create a new Microsoft Entra external ID tenant, you need to have a resource group where the tenant will be created. You can choose an existing one, or create a Resource Groups. In the following Azure REST API, replace the:
- {subscriptionId} with your Azure subscription ID.
- {resourceGroupName} with the name of the resource group to create.
- {azure-location} with the location of the resource group. It cannot be changed after the resource group has been created. It must be one of the supported Azure locations.
PUT https://management.azure.com/subscriptions/{subscriptionId}/resourcegroups/{resourceGroupName}?api-version=2021-04-01
{
  "location": "{azure-location}"
}
Show example
PUT https://management.azure.com/subscriptions/12345678-0000-0000-0000-000000000000/resourcegroups/my-resource-group?api-version=2021-04-01
{
  "location": "eastus"
}
3. Create Microsoft Entra external ID tenant
Initiates an async request to create Microsoft Entra external ID tenant linked to your subscription and within the resource group you created. In the following Azure REST API, replace the:
- {subscriptionId} with your Azure subscription ID.
- {resourceGroupName} with the name of the resource group you created earlier.
- {resourceName} with The initial sub domain of the tenant. For example, contoso, or woodgrove.
- {location} with the location in which the resource is hosted and data resides. Can be one of 'United States', 'Europe', 'Asia Pacific', or 'Australia'.
- {displayName} with a display name of your tenant.
PUT https://management.azure.com/subscriptions/{subscriptionId}/resourceGroups/{resourceGroupName}/providers/Microsoft.AzureActiveDirectory/ciamDirectories/{resourceName}?api-version=2023-05-17-preview
{
  "location": "{location}",
  "sku": {
    "name": "Standard",
    "tier": "A0"
  },
  "properties": {
    "createTenantProperties": {
      "displayName": "{displayName}",
      "countryCode": "US"
    }
  }
}
Show example
PUT https://management.azure.com/subscriptions/12345678-0000-0000-0000-000000000000/resourceGroups/my-resource-group/providers/Microsoft.AzureActiveDirectory/ciamDirectories/contoso?api-version=2023-05-17-preview
{
  "location": "United States",
  "sku": {
    "name": "Standard",
    "tier": "A0"
  },
  "properties": {
    "createTenantProperties": {
      "displayName": "Contoso",
      "countryCode": "US"
    }
  }
}

