Restrict app to a set of users
Applications registered in a Microsoft Entra tenant are, by default, available to all users of the tenant who authenticate successfully. You can configure your application to be restricted to a certain set of users or apps.
Prerequisites
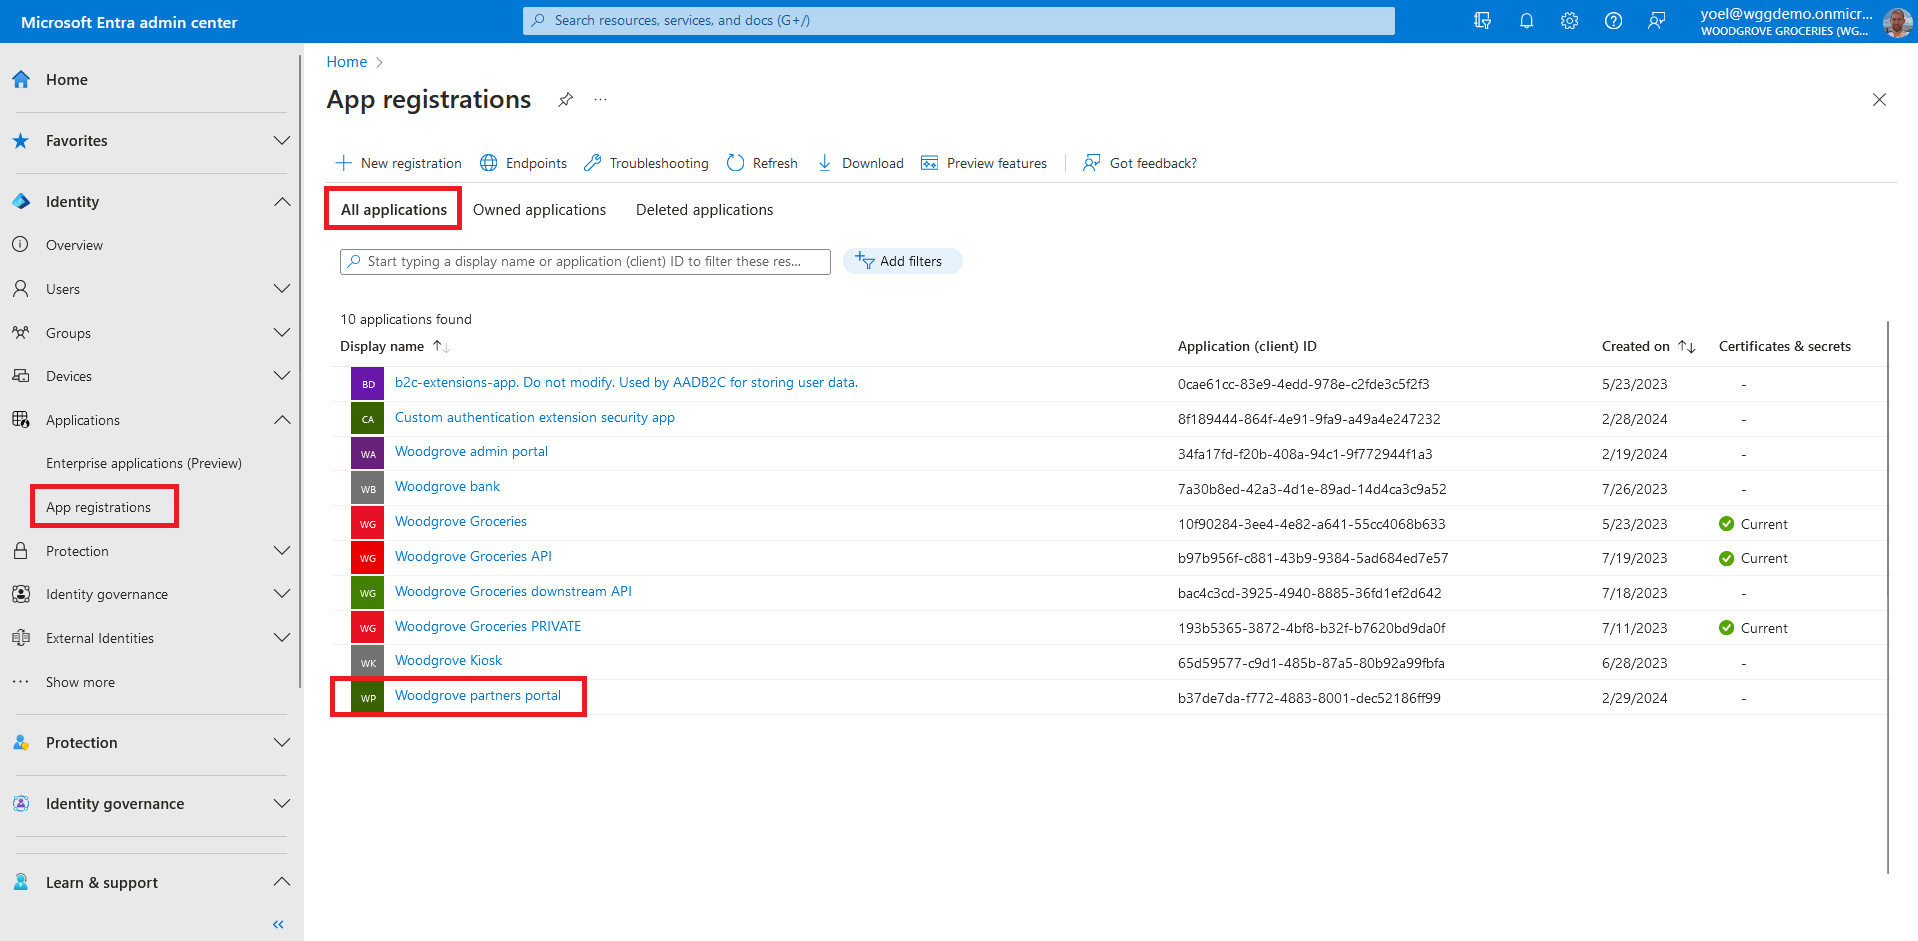
Before you start make sure you have configured the following:To start, sign in to the Microsoft Entra admin center and browse to Identity > App registrations. Select All applications and select the application you want to configure to require assignment. In this example, we want to restrict accesss to the Woodgrove partners portal app.
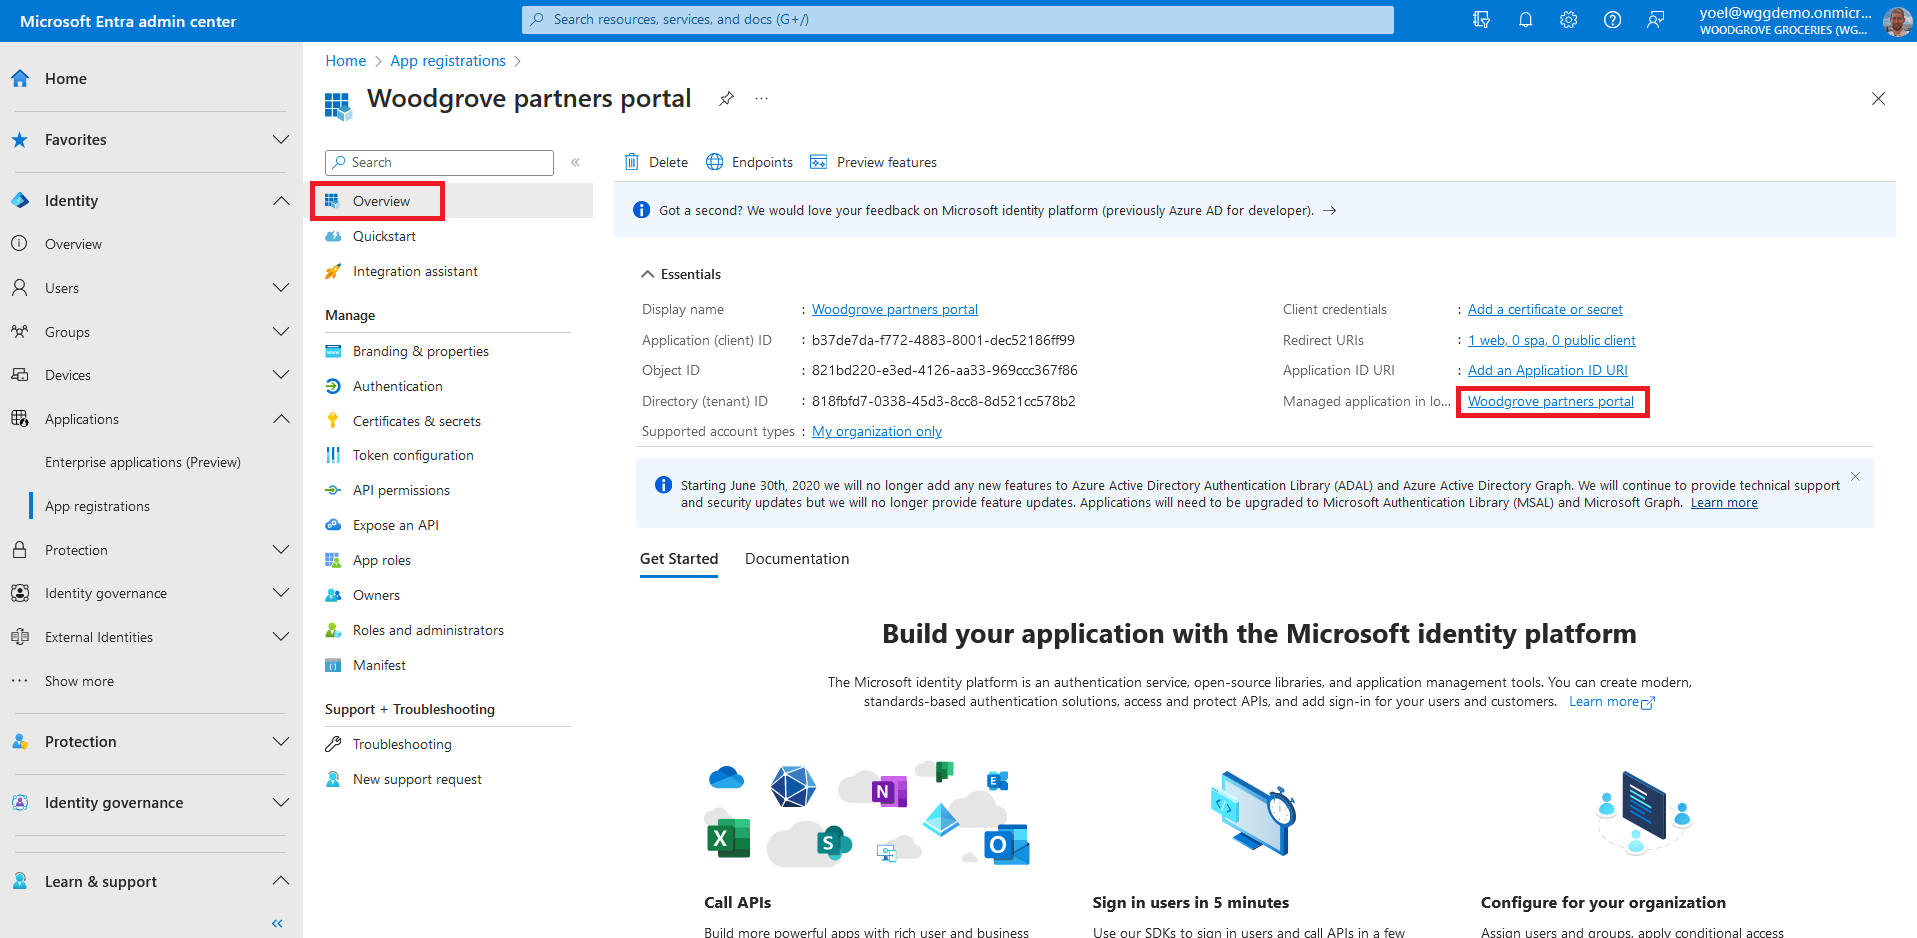
From the app Overview page, select the link next to Managed application in local directory. Note, you can also browse to Enterprise applications, then under Manage, select All applications, and then select your application from the list.
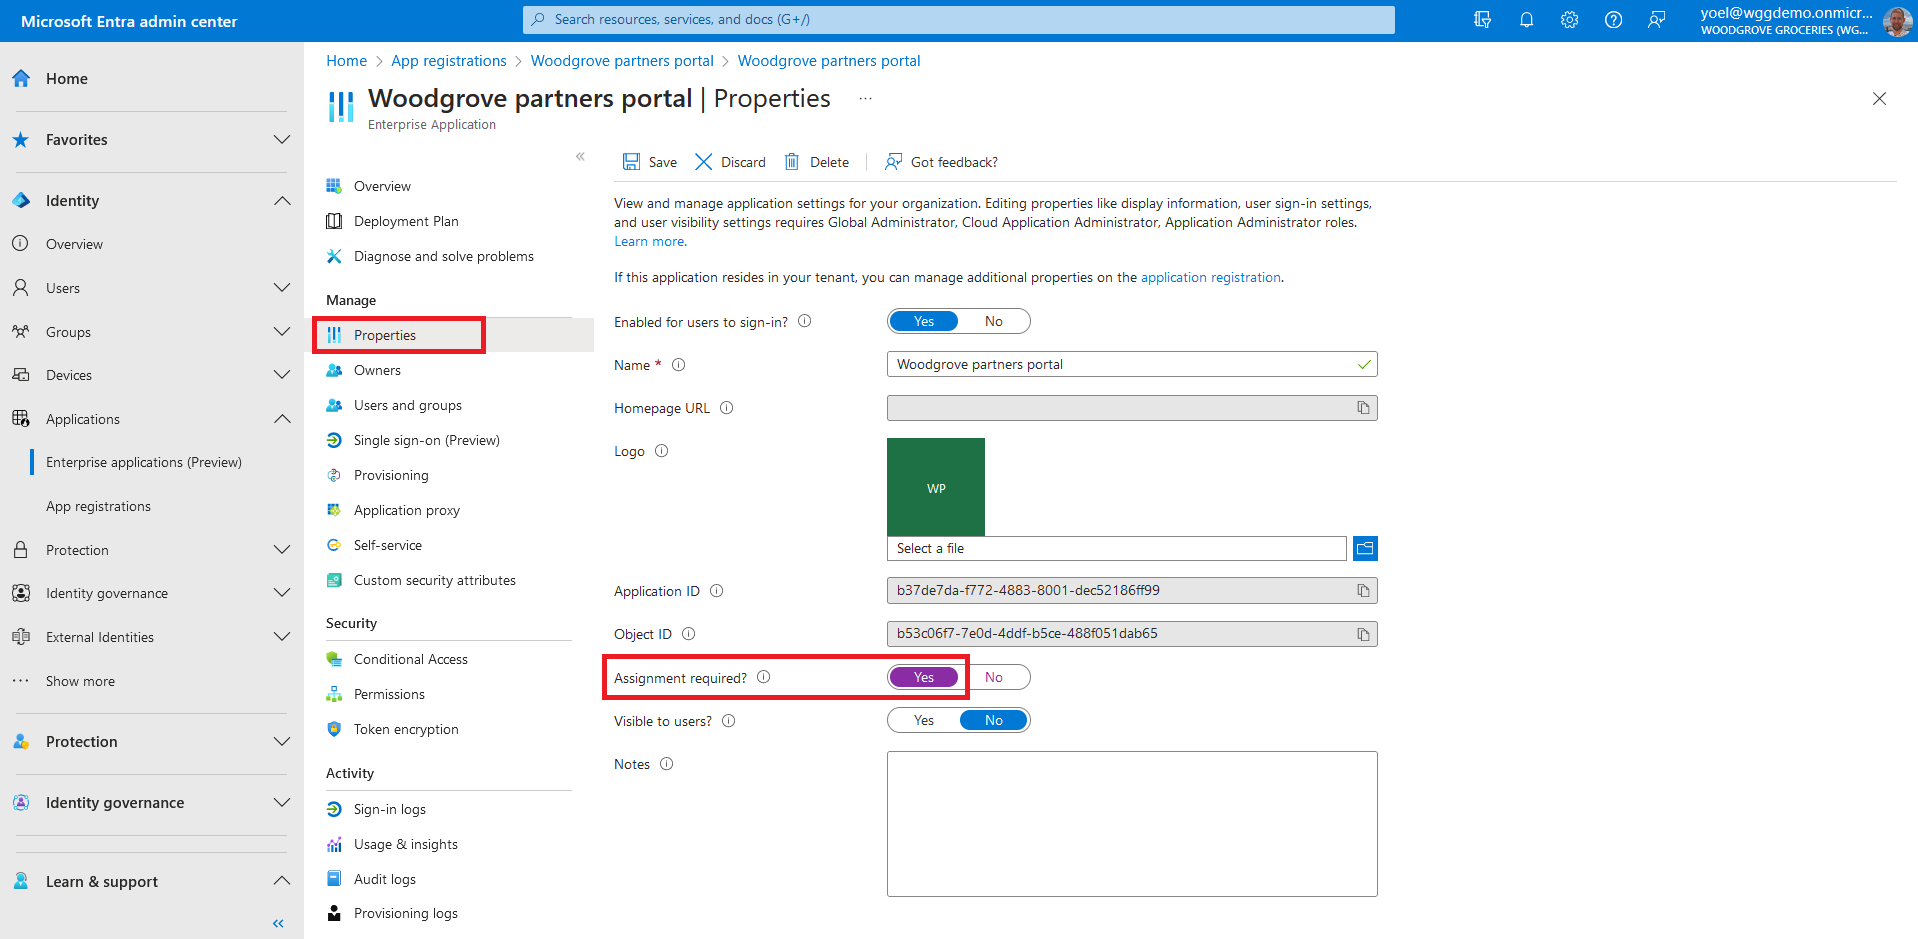
On the application's Overview page, under Manage, select Properties. Locate the setting Assignment required? and set it to Yes. When this option is set to Yes, users must first be assigned for this application, or they won't be able to sign-in or obtain an access token. Select Save on the top bar.
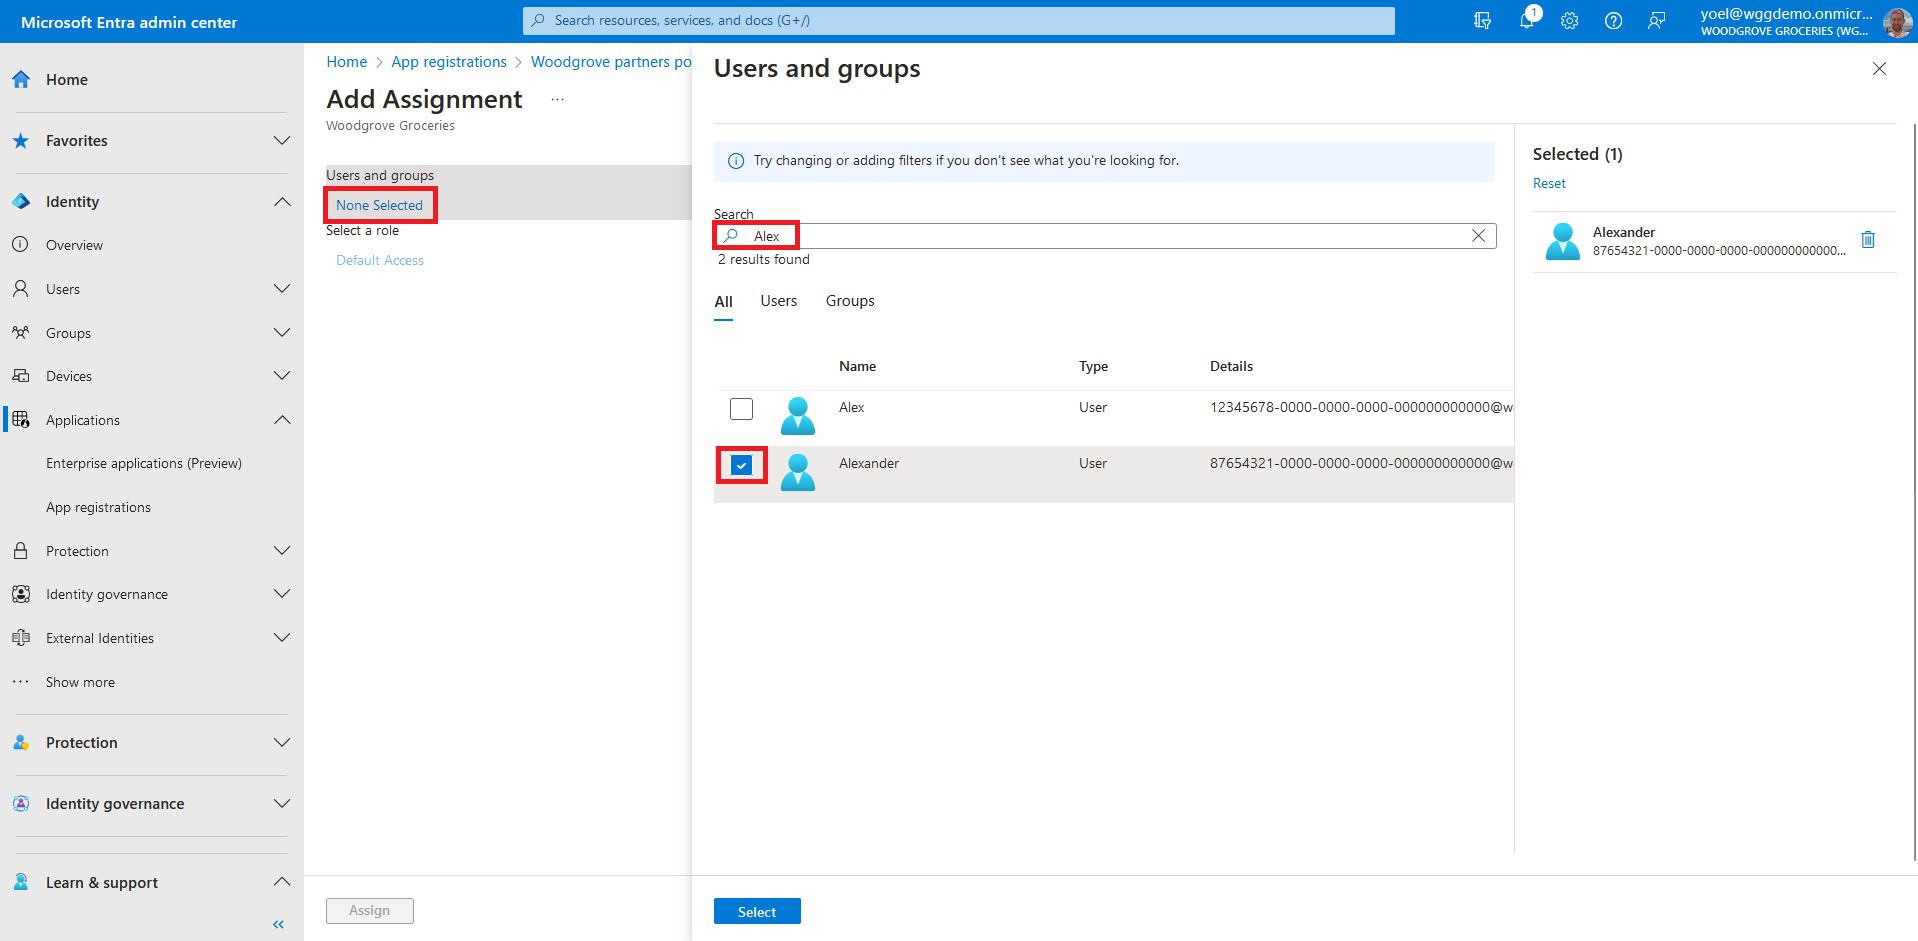
Now that you configured that users must first be assigned for the application. The next step is to assign the app to users. You can do it from Microsoft Entra Admin center (or use Graph API). Under Manage, select the Users and groups then select Add user/group.
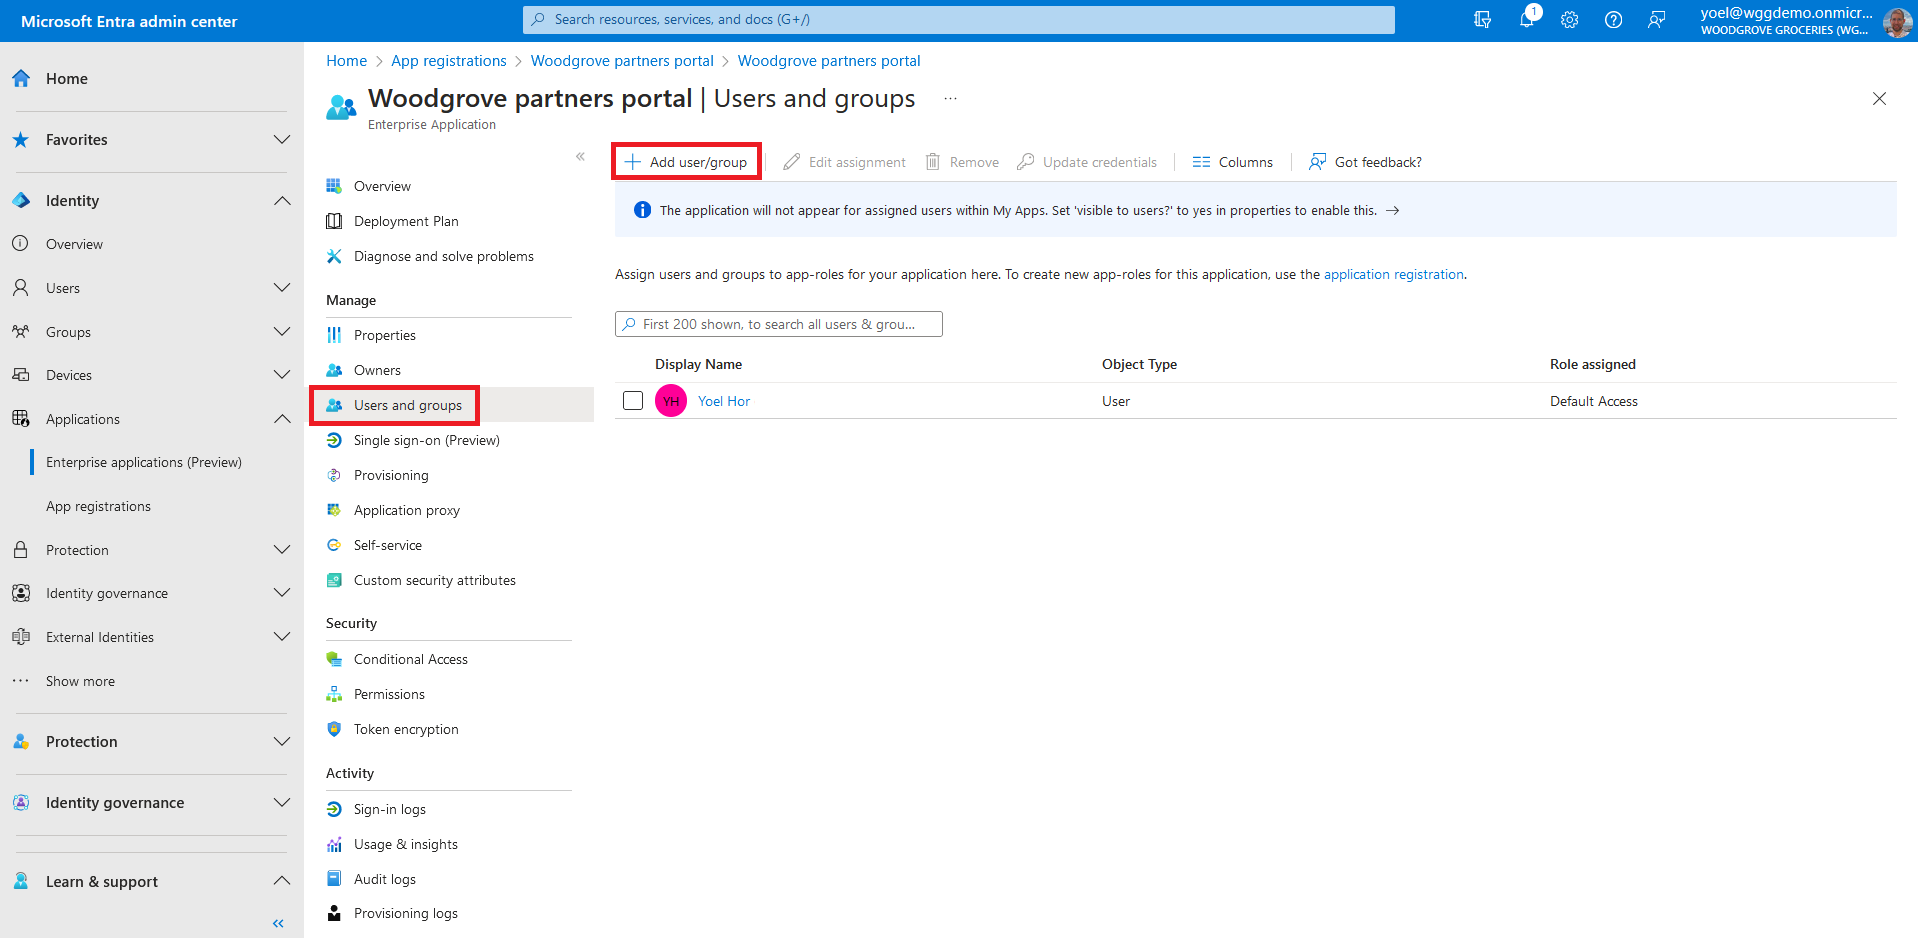
From the Add Assignment page, select the Users and groups selector. A list of users and security groups are shown along with a textbox to search and locate a certain user. This screen allows you to select multiple users and groups in one go. Note, if your application is configured with app roles, select the corresponding roles.
Well done!
Your application restricts access to the users you assigned. To check the user experience, sign-in to your application.
Dependencies
This script is self-contained.1. Register a web application
- Value of {DisplayName} with your app displayed name. For example, Woodgrove Groceries
- Values of the {RedirectUris} with the redirect URI of your application. For example, https://jwt.ms
POST https://graph.microsoft.com/v1.0/applications
Connect-MgGraph -Scopes "Application.ReadWrite.All"
{
    "displayName": "{DisplayName}",
    "description": "Woodgrove partners portal demo application (user assignment is required)",
    "signInAudience": "AzureADMyOrg",
    "api": {
        "acceptMappedClaims": false,
        "requestedAccessTokenVersion": 2
    },
    "requiredResourceAccess": [
        {
            "resourceAppId": "00000003-0000-0000-c000-000000000000",
            "resourceAccess": [
                {
                    "id": "37f7f235-527c-4136-accd-4a02d197296e",
                    "type": "Scope"
                },
                {
                    "id": "7427e0e9-2fba-42fe-b0c0-848c9e6a8182",
                    "type": "Scope"
                }
            ]
        }
    ],
    "web": {
        "redirectUris": [
            "{RedirectUris}"
        ],
        "implicitGrantSettings": {
            "enableAccessTokenIssuance": false,
            "enableIdTokenIssuance": true
        }
    }
}
New-MgApplication -BodyParameter $paramsPOST https://graph.microsoft.com/v1.0/applications
{
    "displayName": "Woodgrove partners portal",
    "description": "Woodgrove partners portal demo application (user assignment is required)",
    "signInAudience": "AzureADMyOrg",
    "api": {
        "acceptMappedClaims": false,
        "requestedAccessTokenVersion": 2
    },
    "requiredResourceAccess": [
        {
            "resourceAppId": "00000003-0000-0000-c000-000000000000",
            "resourceAccess": [
                {
                    "id": "37f7f235-527c-4136-accd-4a02d197296e",
                    "type": "Scope"
                },
                {
                    "id": "7427e0e9-2fba-42fe-b0c0-848c9e6a8182",
                    "type": "Scope"
                }
            ]
        }
    ],
    "web": {
        "redirectUris": [
            "https://jwt.ms"
        ],
        "implicitGrantSettings": {
            "enableAccessTokenIssuance": false,
            "enableIdTokenIssuance": true
        }
    }
}
New-MgApplication -BodyParameter $params1.1 Copy your applicaion ID
From the response, copy the appId (not the id). For example:
{
    "@odata.context": "https://graph.microsoft.com/v1.0/$metadata#servicePrincipals/$entity",
    "id": "12345678-0000-0000-0000-000000000000",
    "appDisplayName": "Woodgrove partners portal",
    "appId": "11111111-0000-0000-0000-000000000000"
}
1.2 Create a service principal for your application
After you register you registered your application, create a service principal. The following Microsoft Graph creates a service principal. Replace the {app-ID} with the app ID from the previous call (not the object ID).
POST https://graph.microsoft.com/v1.0/servicePrincipals
Connect-MgGraph -Scopes "Application.ReadWrite.All"
{
    "appId": "{app-ID}"
}
New-MgServicePrincipal -BodyParameter $paramsPOST https://graph.microsoft.com/v1.0/servicePrincipals
{
    "appId": "11111111-0000-0000-0000-000000000000"
}
New-MgServicePrincipal -BodyParameter $params1.3 Copy your service principal ID
From the response, copy the id. For example:
{
    "@odata.context": "https://graph.microsoft.com/v1.0/$metadata#servicePrincipals/$entity",
    "id": "22222222-0000-0000-0000-000000000000",
    "appId": "11111111-0000-0000-0000-000000000000"
}
1.4 Get the Microsoft Graph's service principal ID
Run the following command to get the Microsoft Graph service principal ID:
GET https://graph.microsoft.com/v1.0/servicePrincipals(appId='00000003-0000-0000-c000-000000000000')
Get-MgServicePrincipal -ServicePrincipalId appId='00000003-0000-0000-c000-000000000000' 1.4.1 Copy Microsoft Graph service principal ID
Copy the id from the response:
{
    "id": "33333333-0000-0000-0000-000000000000",
    "appDisplayName": "Microsoft Graph",
    "appId": "00000003-0000-0000-c000-000000000000"
}
1.5 Consent to the required permissions
Since the tenant is a customer's tenant, the consumer users themselves can't consent to these permissions. You as the admin must consent to these permissions on behalf of all the users in the tenant: Replace the {service-principal-id} with the service-principal id you copied in the previous step. Replace the {graph-service-principal-id} with the Microsot Graph service-principal ID you created in the previous step.
POST https://graph.microsoft.com/v1.0/oauth2PermissionGrants
Connect-MgGraph -Scopes "DelegatedPermissionGrant.ReadWrite.All"
{
    "clientId": "{service-principal-id}",
    "consentType": "AllPrincipals",
    "resourceId": "{graph-service-principal-id}",
    "scope": "openid offline_access"
}
New-MgOauth2PermissionGrant -BodyParameter $paramsPOST https://graph.microsoft.com/v1.0/oauth2PermissionGrants
{
    "clientId": "22222222-0000-0000-0000-000000000000",
    "consentType": "AllPrincipals",
    "resourceId": "33333333-0000-0000-0000-000000000000",
    "scope": "openid offline_access"
}
New-MgOauth2PermissionGrant -BodyParameter $params2. Configure role assignment requirement
Update the service principal of your application to require role assignment. Replace the {service-principal-id} with the service-principal ID you created in the previous step.
PATCH https://graph.microsoft.com/v1.0/servicePrincipals/{service-principal-id}
Connect-MgGraph -Scopes "Application.ReadWrite.All"
{
    "appRoleAssignmentRequired": true
}
Update-MgServicePrincipal -ServicePrincipalId {service-principal-id} -BodyParameter $paramsPATCH https://graph.microsoft.com/v1.0/servicePrincipals/22222222-0000-0000-0000-000000000000
{
    "appRoleAssignmentRequired": true
}
Update-MgServicePrincipal -ServicePrincipalId 22222222-0000-0000-0000-000000000000 -BodyParameter $params