Role-based access control
Role-based access control is a popular mechanism to enforce authorization in applications. It helps you manage who has access to your application and what they can do in the application, and also alter the UI based on the user's role. An application developer defines the roles for the application. Then these roles can be assigned to users. In this demo, users assign themselves to application roles which are automatically approved. For more information, learn how to use role-based access control for applications.
Prerequisites
Before you start make sure you have configured the following:Start by declaring roles for your application. The roles define their level of access to the resources and operations in your application. Sign in to the Microsoft Entra admin center and browse to Identity > Applications > App registrations. Then, select the application you want to define app roles.
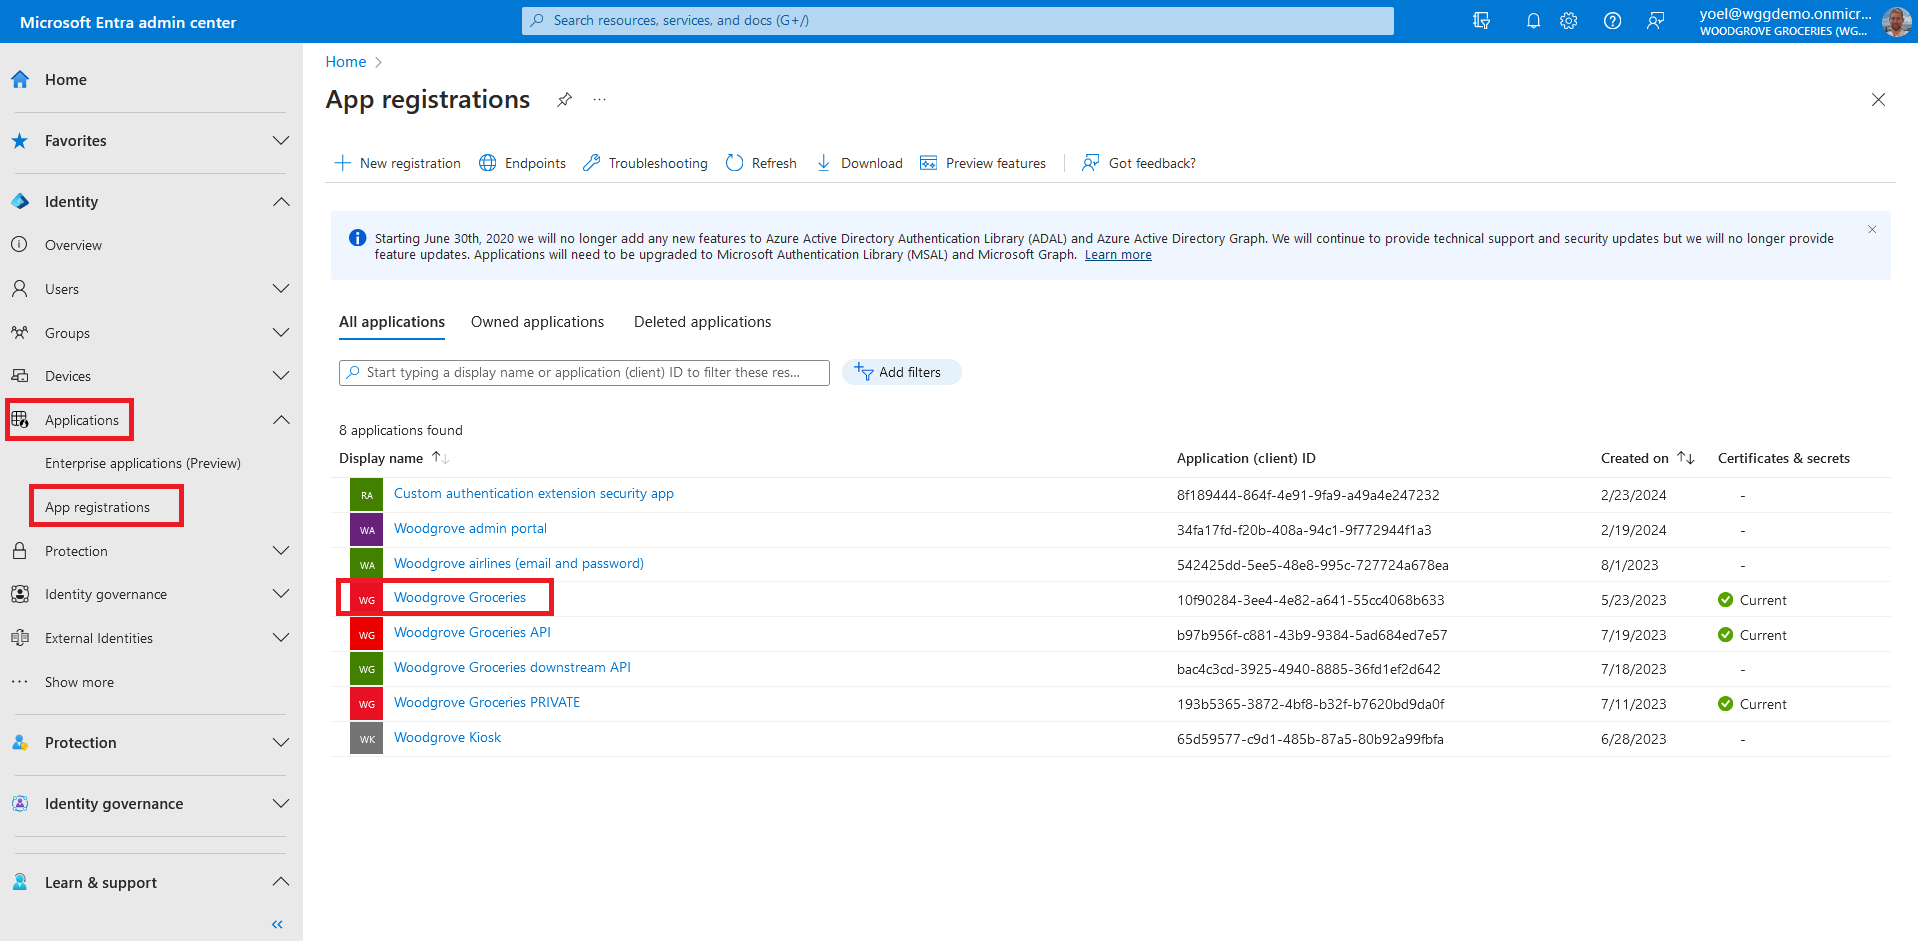
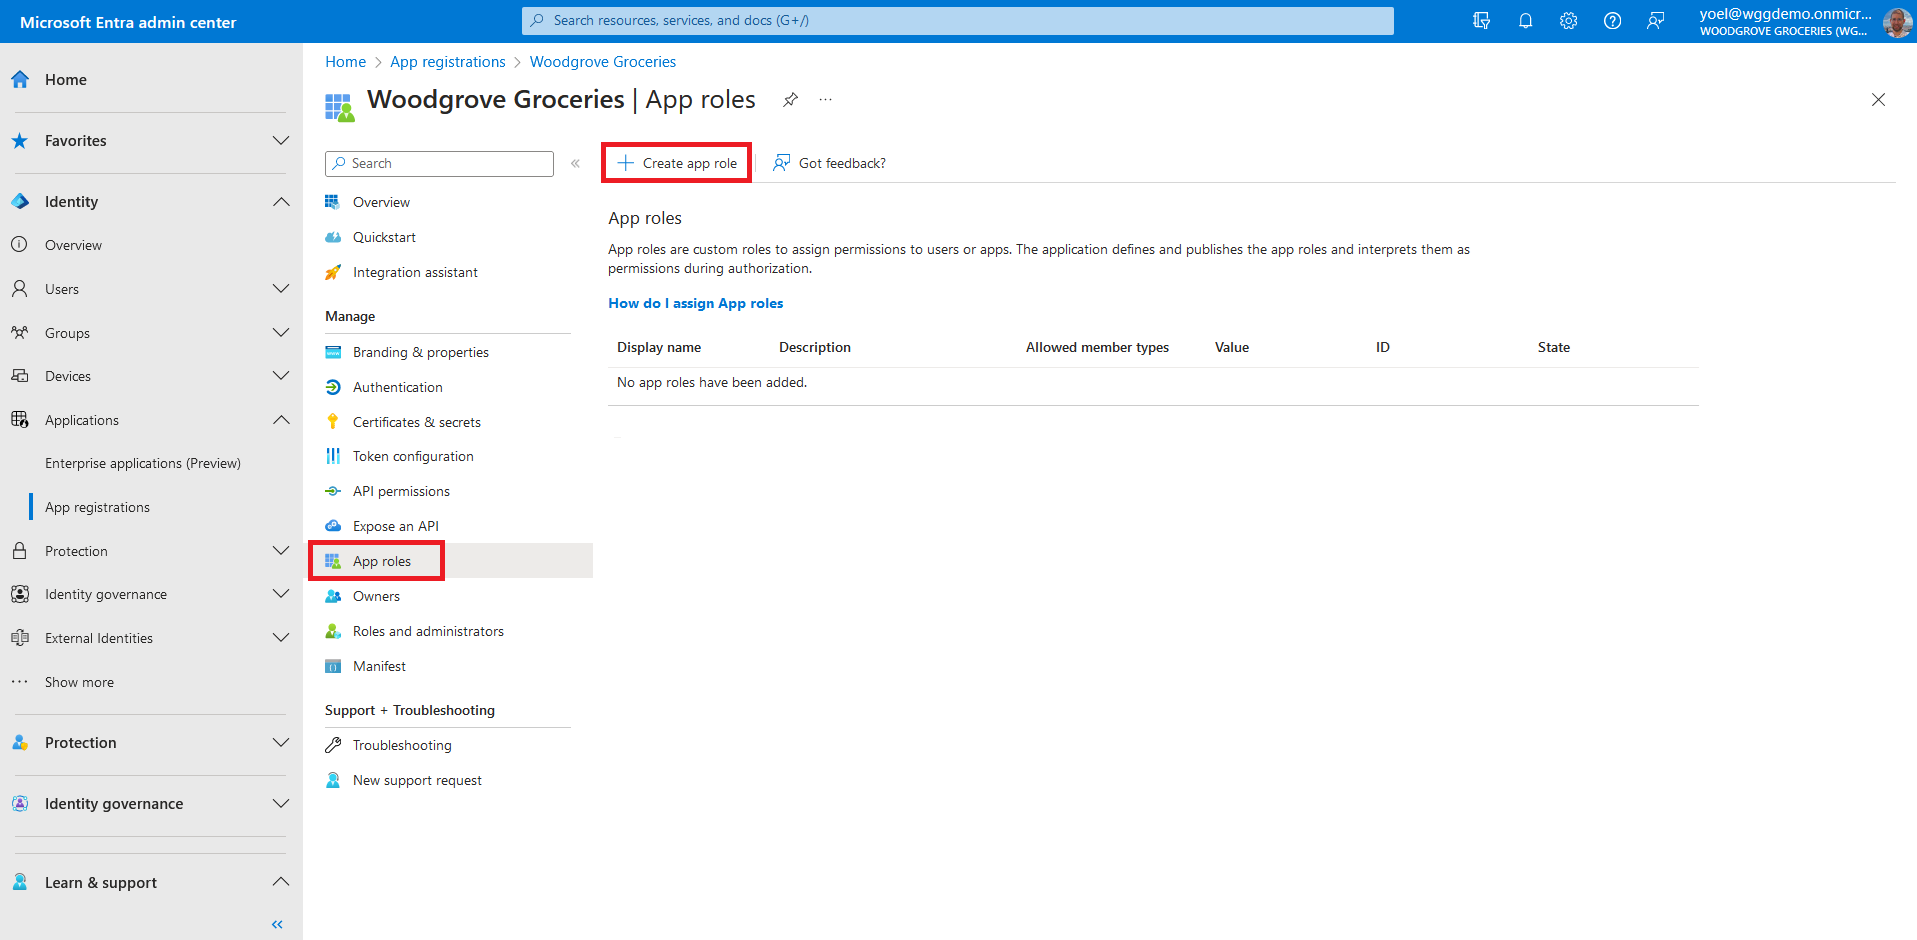
Select App roles, and then select Create app role.
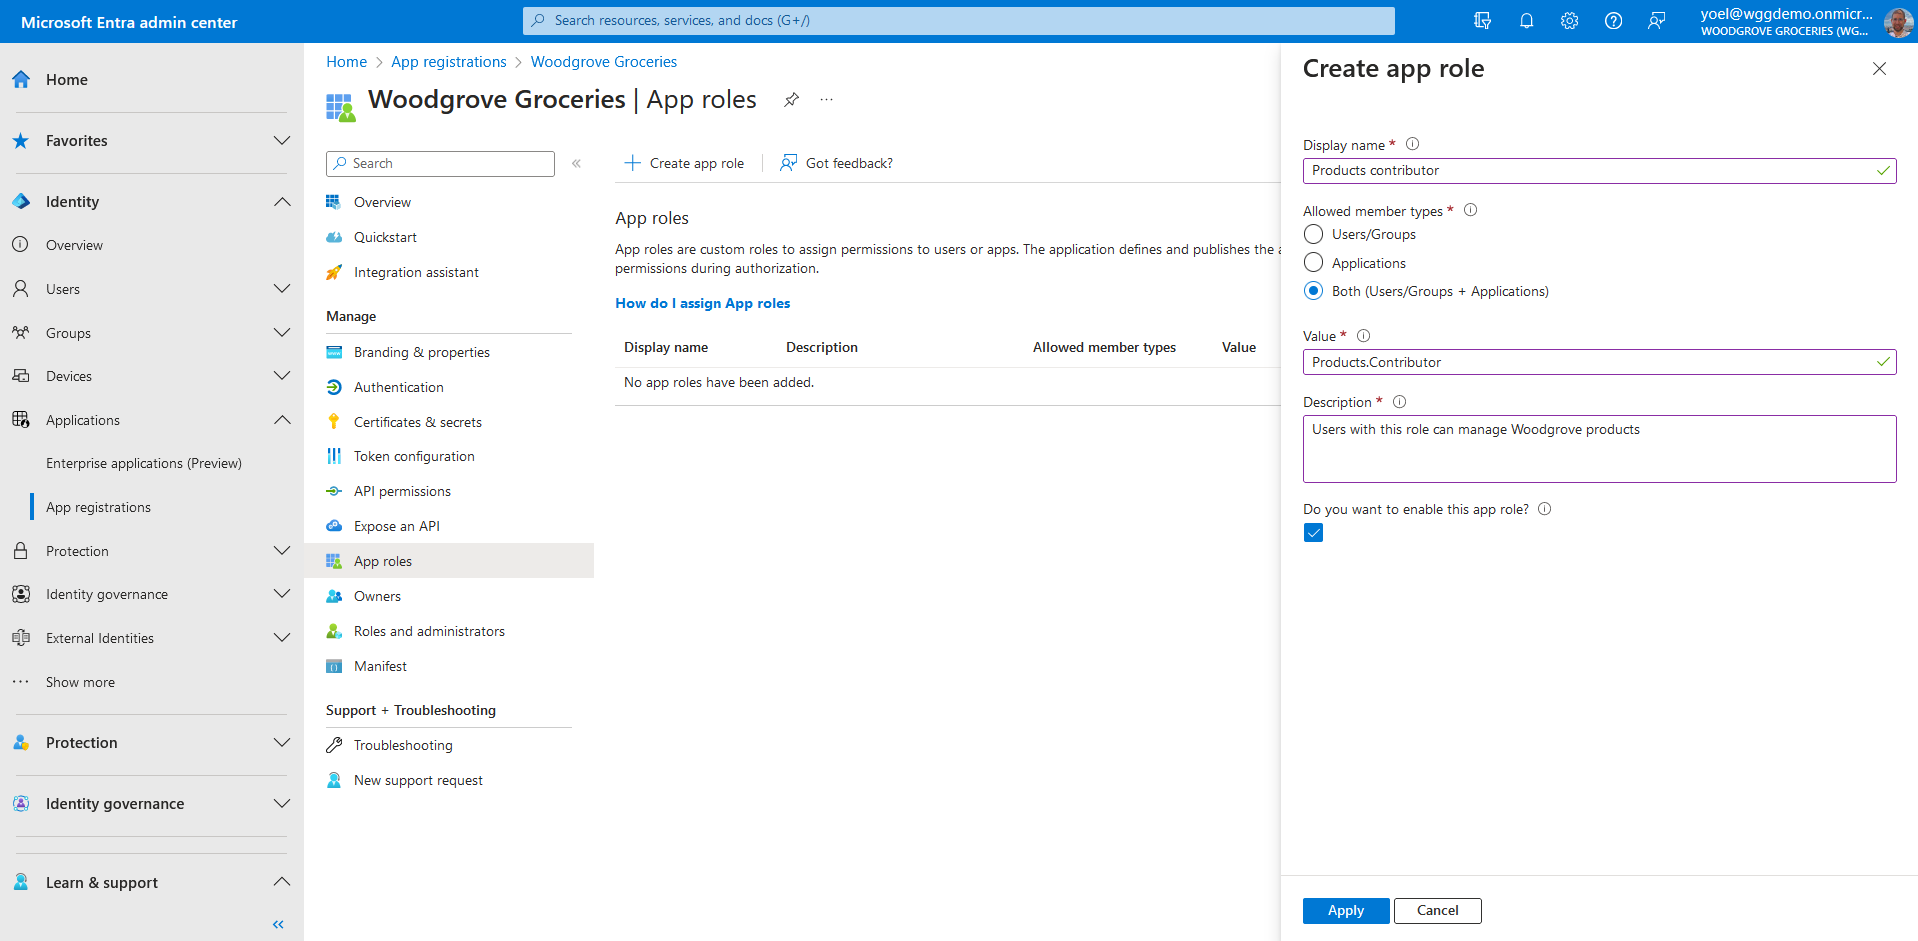
In the Create app role pane, enter the settings for the role.
- Display name for the app role that appears in the app assignment experiences.
- Allowed member types - specifies whether this app role can be assigned to users, applications, or both.
- Value - should match exactly the string referenced in the application's code.
- Description of the app role displayed during admin app assignment experiences.
- Do you want to enable this app role? - Yes
Once you've added app roles in your application, administrator can assign users and groups to the roles. Assignment of users and groups to roles can be done through the admin center, or programmatically using Microsoft Graph. When the users who assigned to the various app roles sign-in to the application, their tokens have their assigned roles in the roles claim.
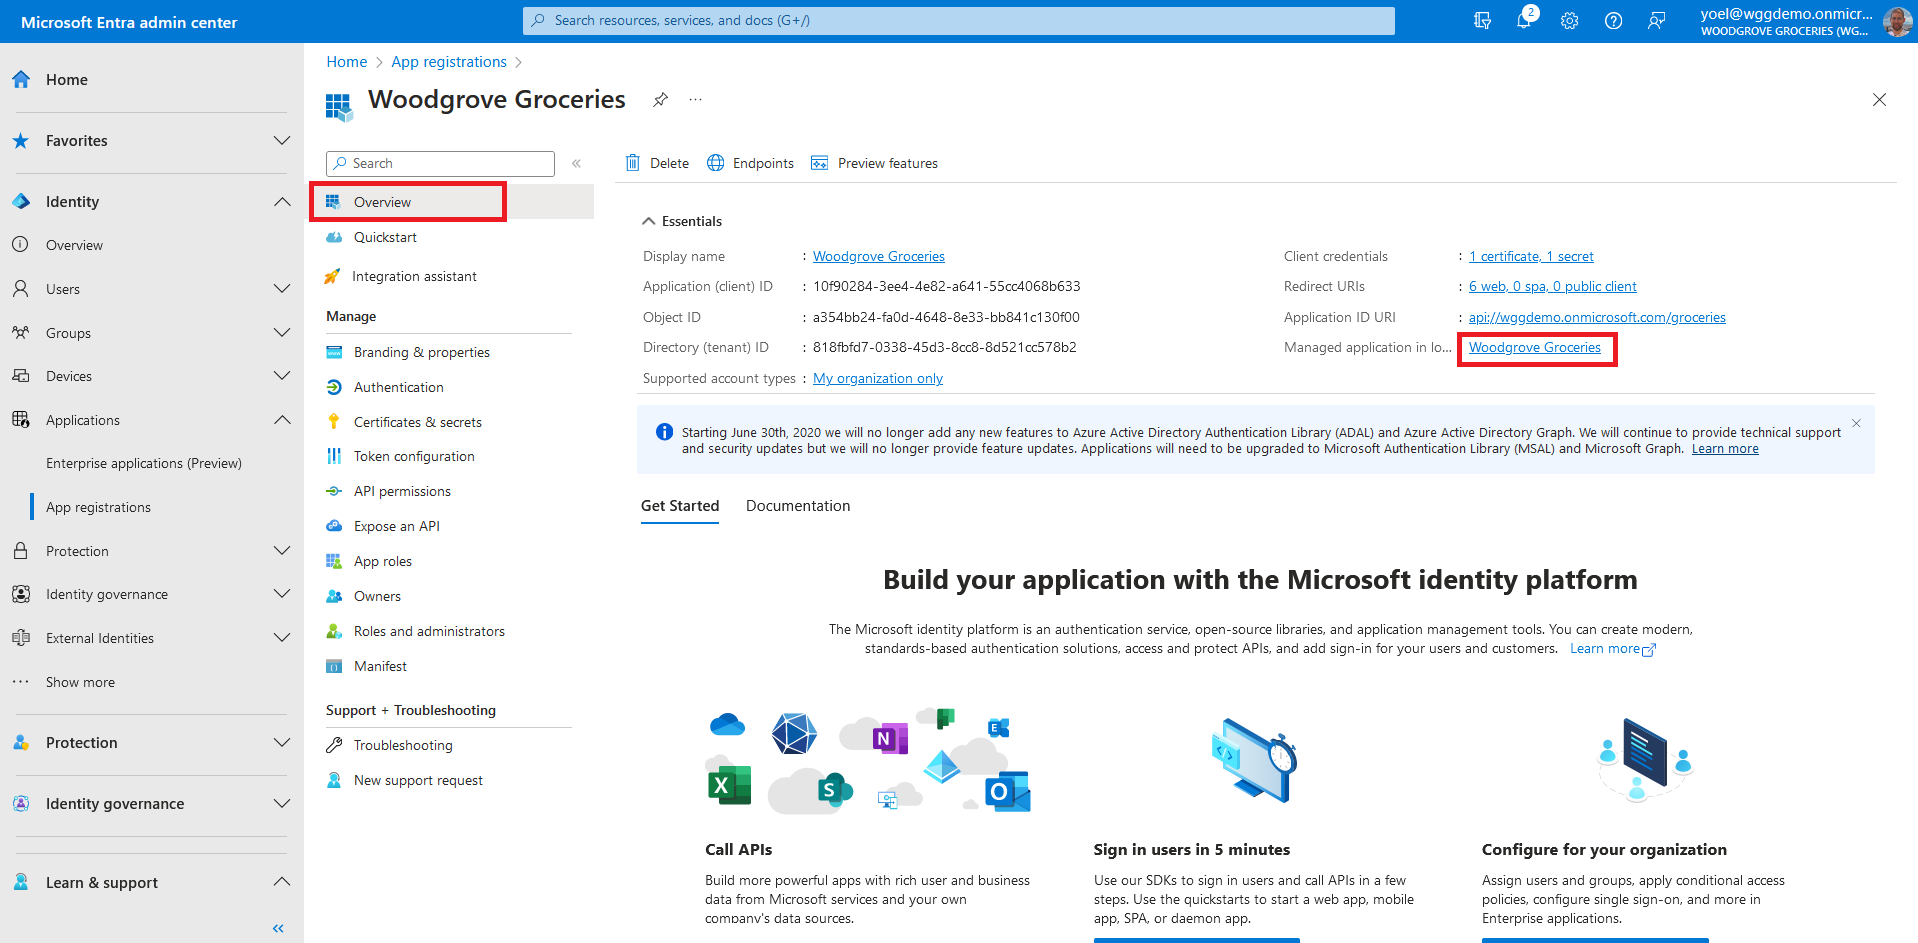
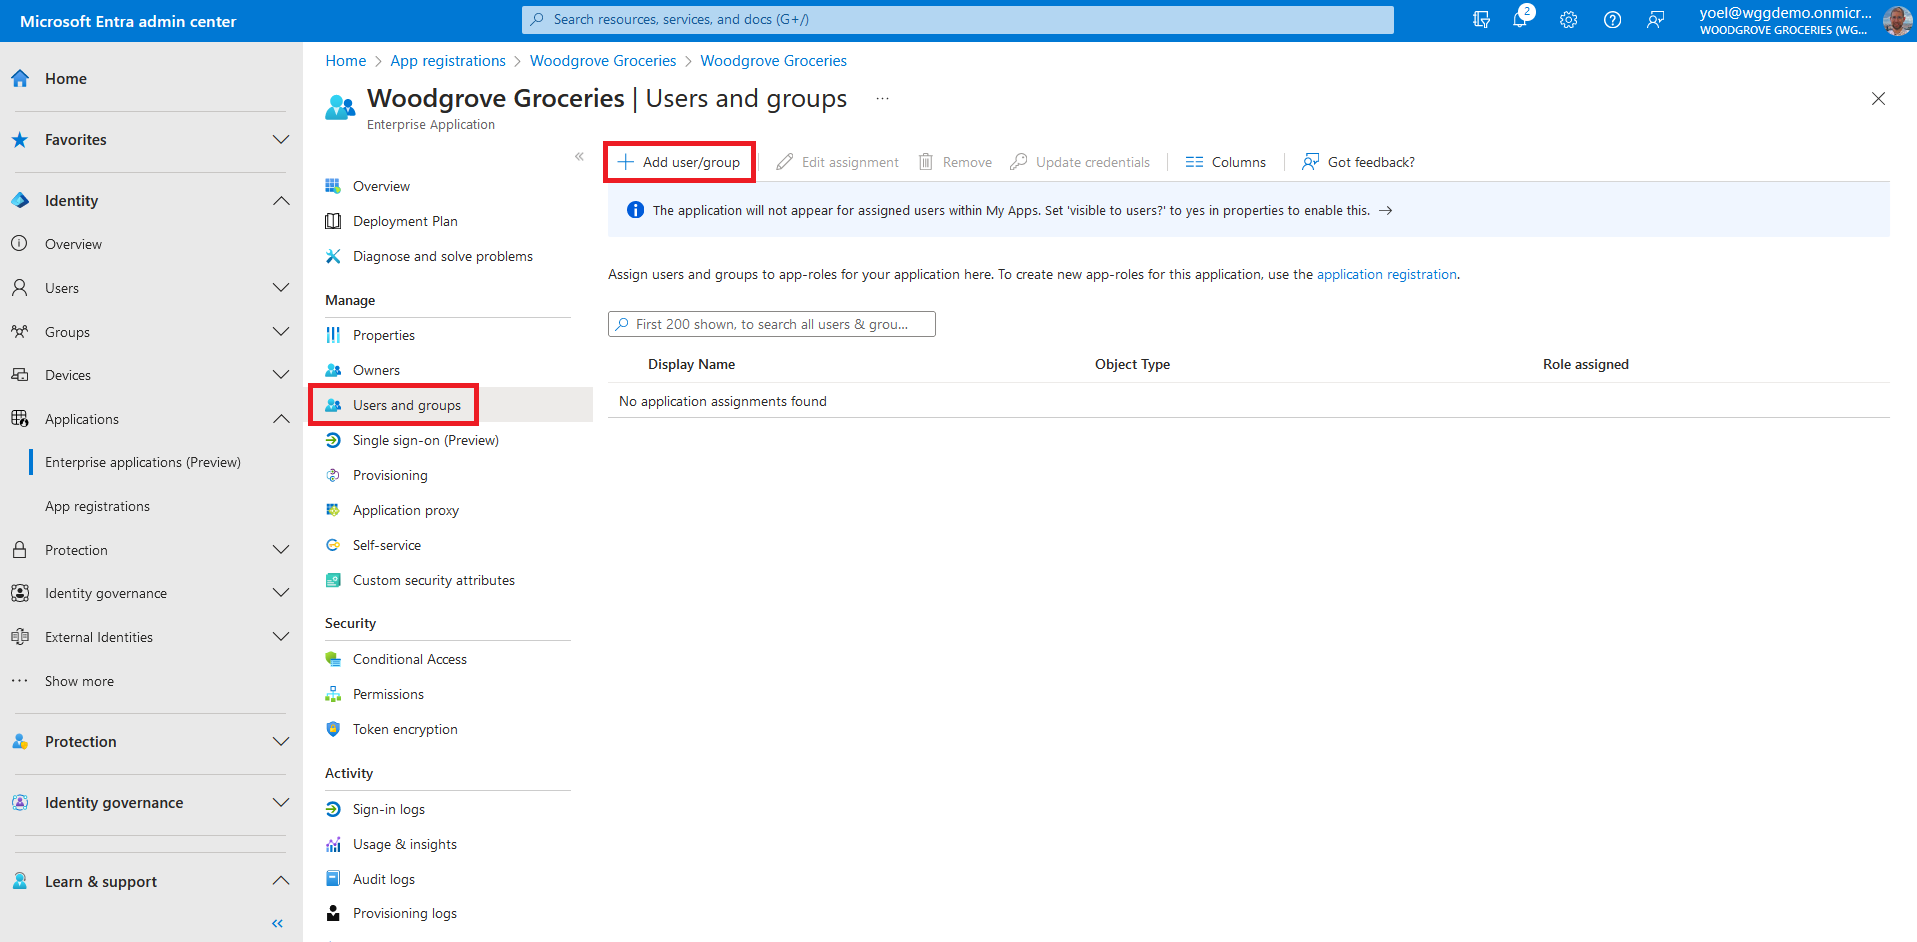
To assign users and groups to application roles, from the menu select Overview. Then select the link next to Managed application in local directory . Note, you can also browse to Enterprise applications, then under Manage, select All applications, and then select your application from the list.
Under Manage, select Users and groups, then select Add user/group.
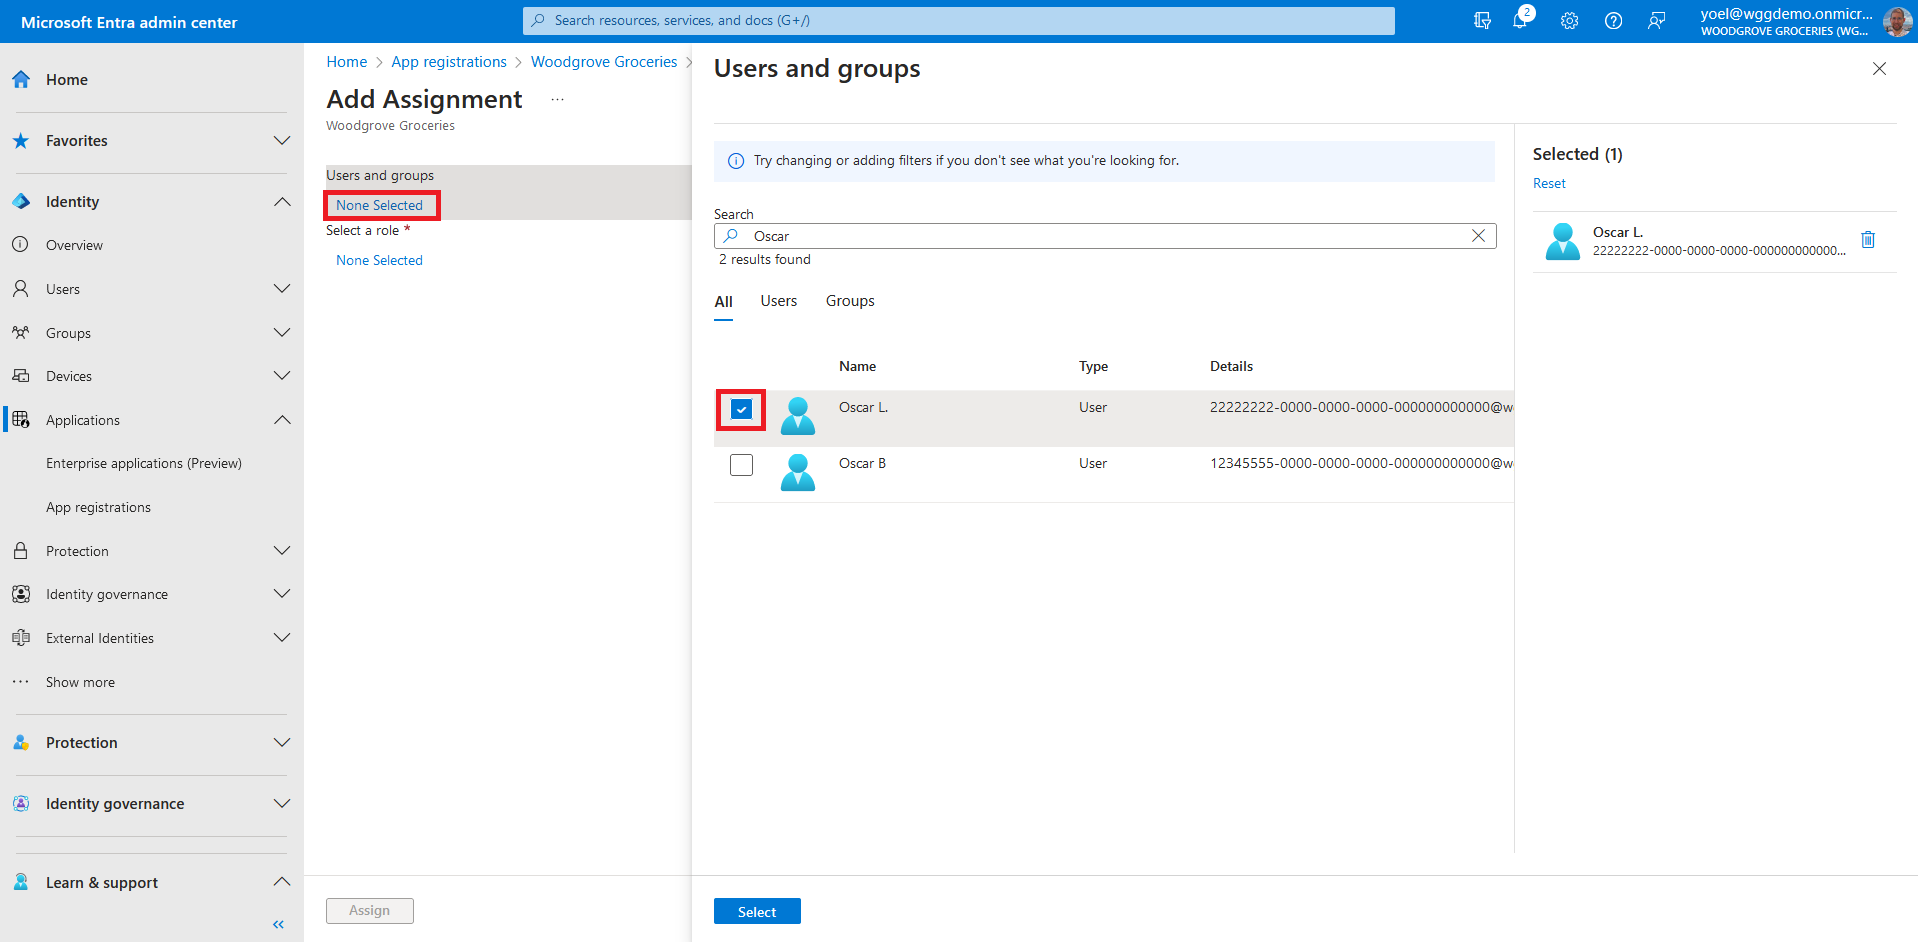
In the Add Assignment pane, select Users and groups. A list of users and security groups appears. You can select multiple users and groups in the list. Once you've selected users and groups, choose Select.
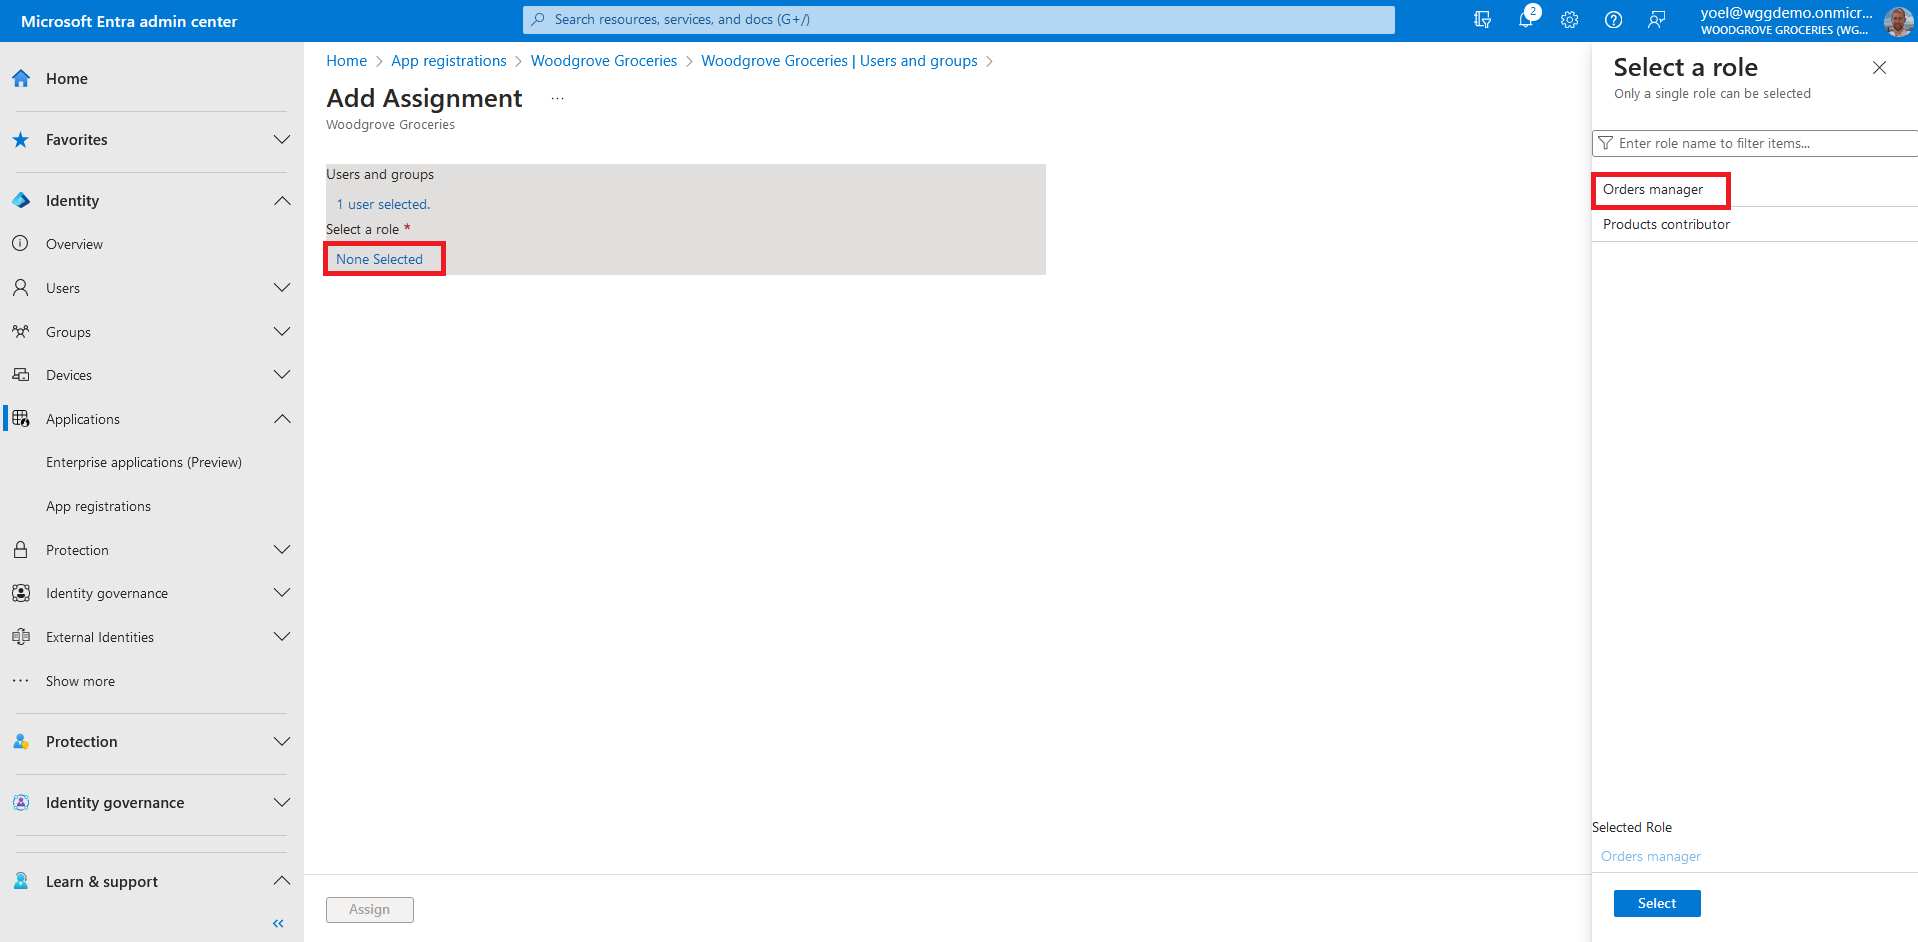
In the Add Assignment pane, choose Select a role. All the roles you defined for the application appear. Select a role, and then choose Select. You can select one role at a time.
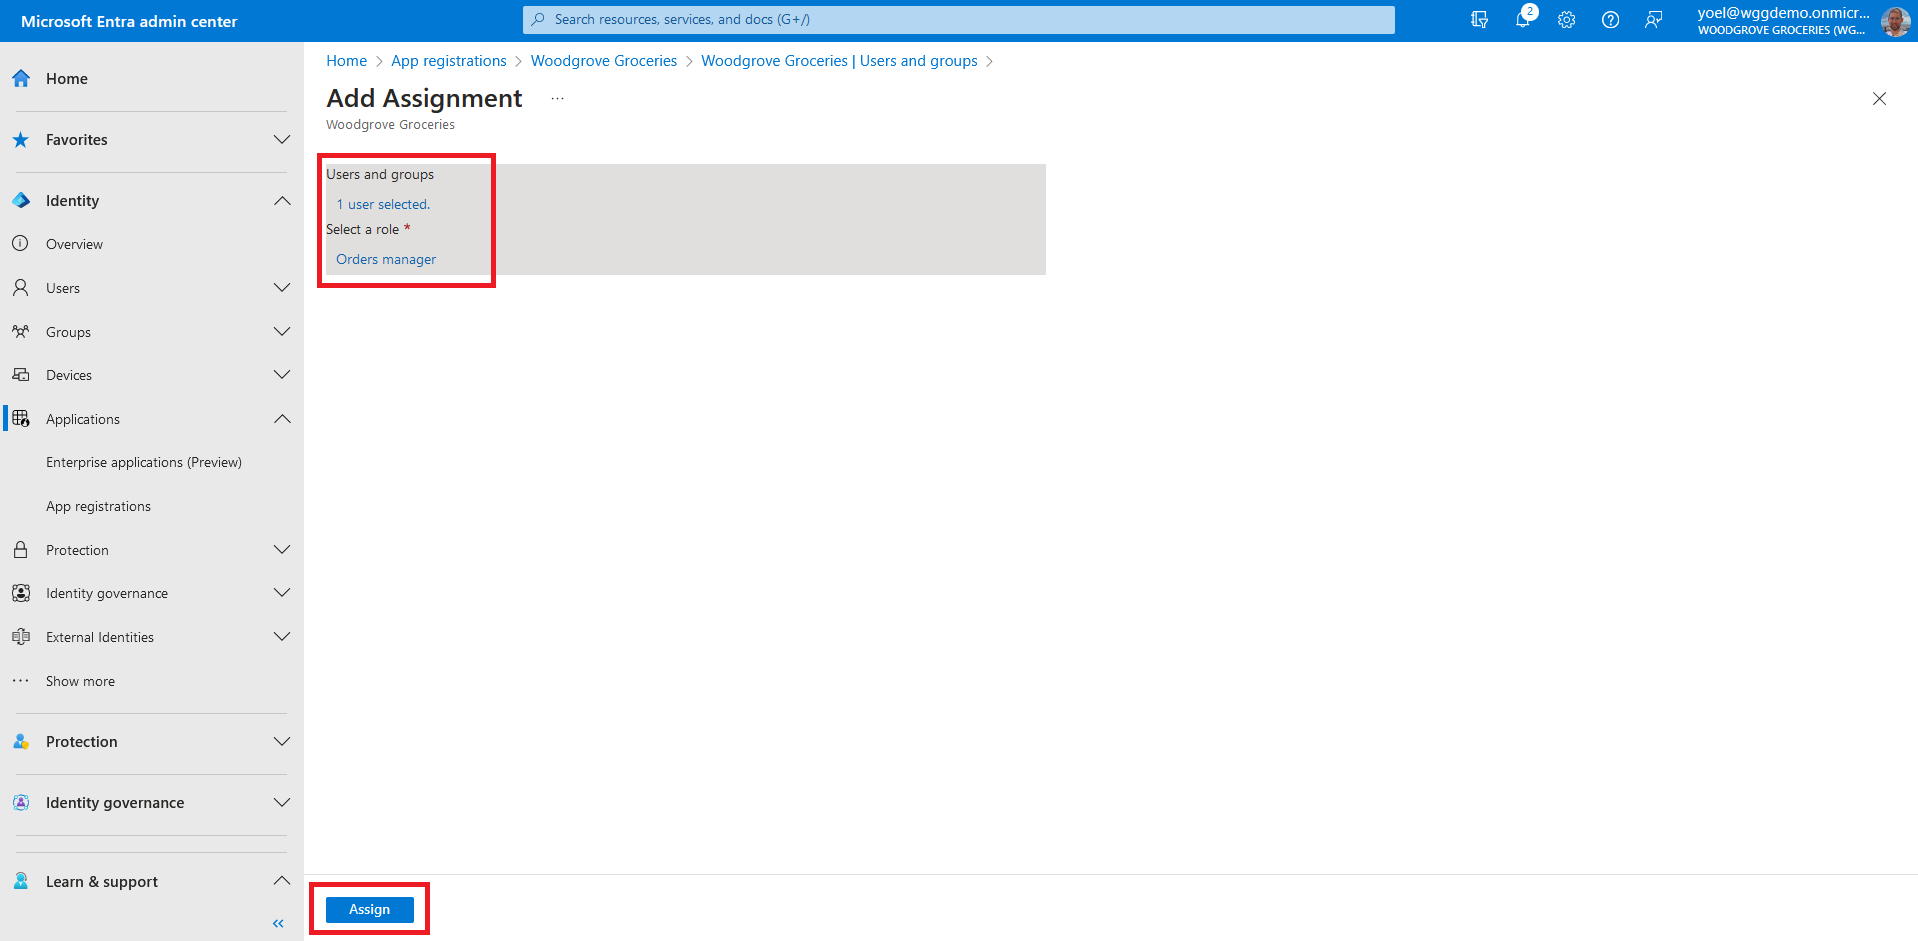
Select Assign to finish the assignment of users and groups to the app. To assing more roles to users, repeat the last three steps.
Well done!
Now when users who assiged roles sign-in to the application, their tokens have their assigned roles in the roles claim.
Configure role assignment requirement
To add roles for your application, you need to update the app. In the following JSON, make sure the IDs are valid unique GUID (global unique identifier). Replace the {App-ID} with your application ID (not object ID).
PATCH https://graph.microsoft.com/v1.0/applications(appId='{App-ID}')
{
    "appRoles": [
        {
            "allowedMemberTypes": [
                "User",
                "Application"
            ],
            "description": "Woodgrove Groceries products contributor",
            "displayName": "Products contributor",
            "id": "50000002-0211-4131-bfab-000000000000",
            "isEnabled": true,
            "origin": "Application",
            "value": "Products.Contributor",
            "isPreAuthorizationRequired": false,
            "isPrivate": false
        },
        {
            "allowedMemberTypes": [
                "User",
                "Application"
            ],
            "description": "Woodgrove Groceries online orders manager",
            "displayName": "Orders manager",
            "id": "50000001-0211-4131-bfab-000000000000",
            "isEnabled": true,
            "origin": "Application",
            "value": "Orders.Manager",
            "isPreAuthorizationRequired": false,
            "isPrivate": false
        }
    ]
}
Assign users and groups to the app roles
Once you've added app roles in your application, you can assign users and groups to the roles.
Note, to add a user to more than one role, repeat this step and change the {App-role-ID}.
Also, you can add a security group to application role (using the
groups endpoint).
In the following Graph, replace:
POST https://graph.microsoft.com/v1.0/users/{User-ID}/appRoleAssignments
{
    "appRoleId": "{App-role-ID}",
    "principalId": "{User-ID}",
    "resourceId": "{service-principal-id}"
}