Validate sign-up attributes
The custom authentication extension supports the on attribute collection submit event. This event allows you to perform validation on attributes collected from the user during sign-up. This demo validates the City name against a list of countries compiled in the Woodgrove custom authentication extension REST API. Also, if the city contains block, Microsoft Entra ID will show block page. If the city contains modify, Microsoft Entra ID will modify some of the attributes (display name and city).
Prerequisites
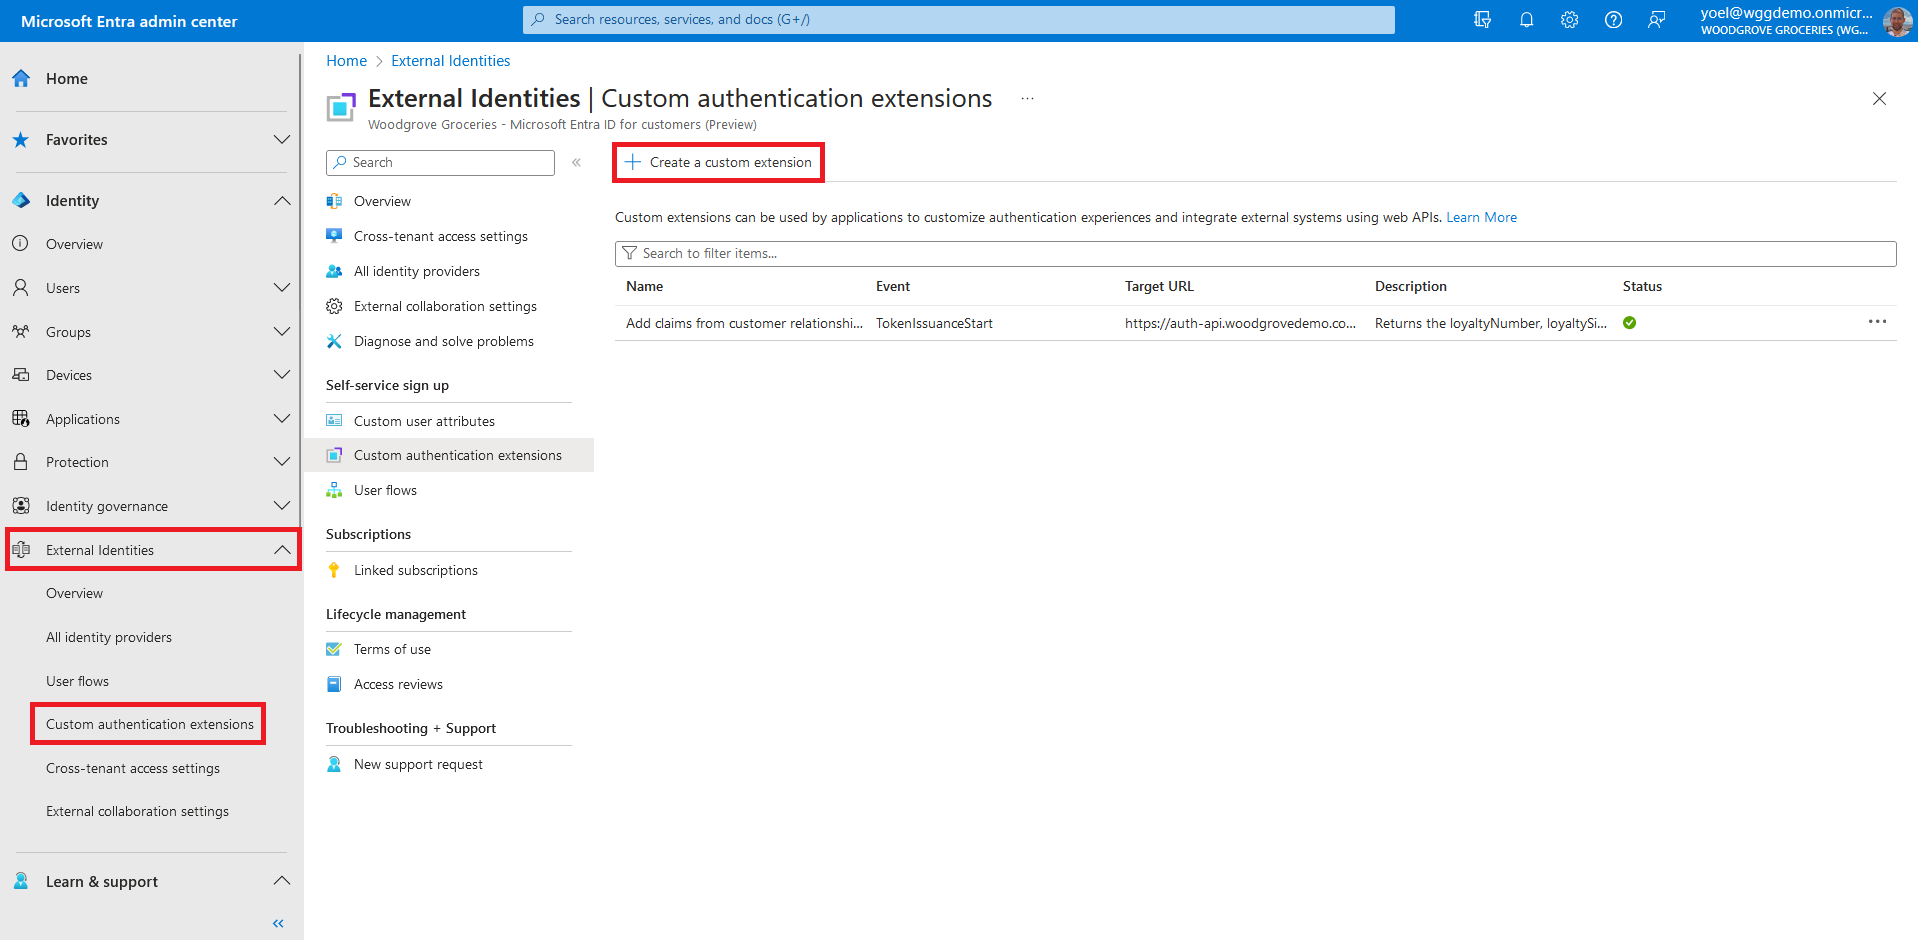
Before you start make sure you have configured the following:Start by registering a custom authentication extension that is used by Microsoft Entra ID to call your REST API. The custom authentication extension contains information about your REST API endpoint, the attribute collection start action that it parses from your REST API, and how to authenticate to your REST API. Sign in to the Microsoft Entra admin center and browse to External Identities > Custom authentication extensions. Note, you can also browse to Applications > Enterprise applications > Custom authentication extensions . Then, select Create a custom extension.
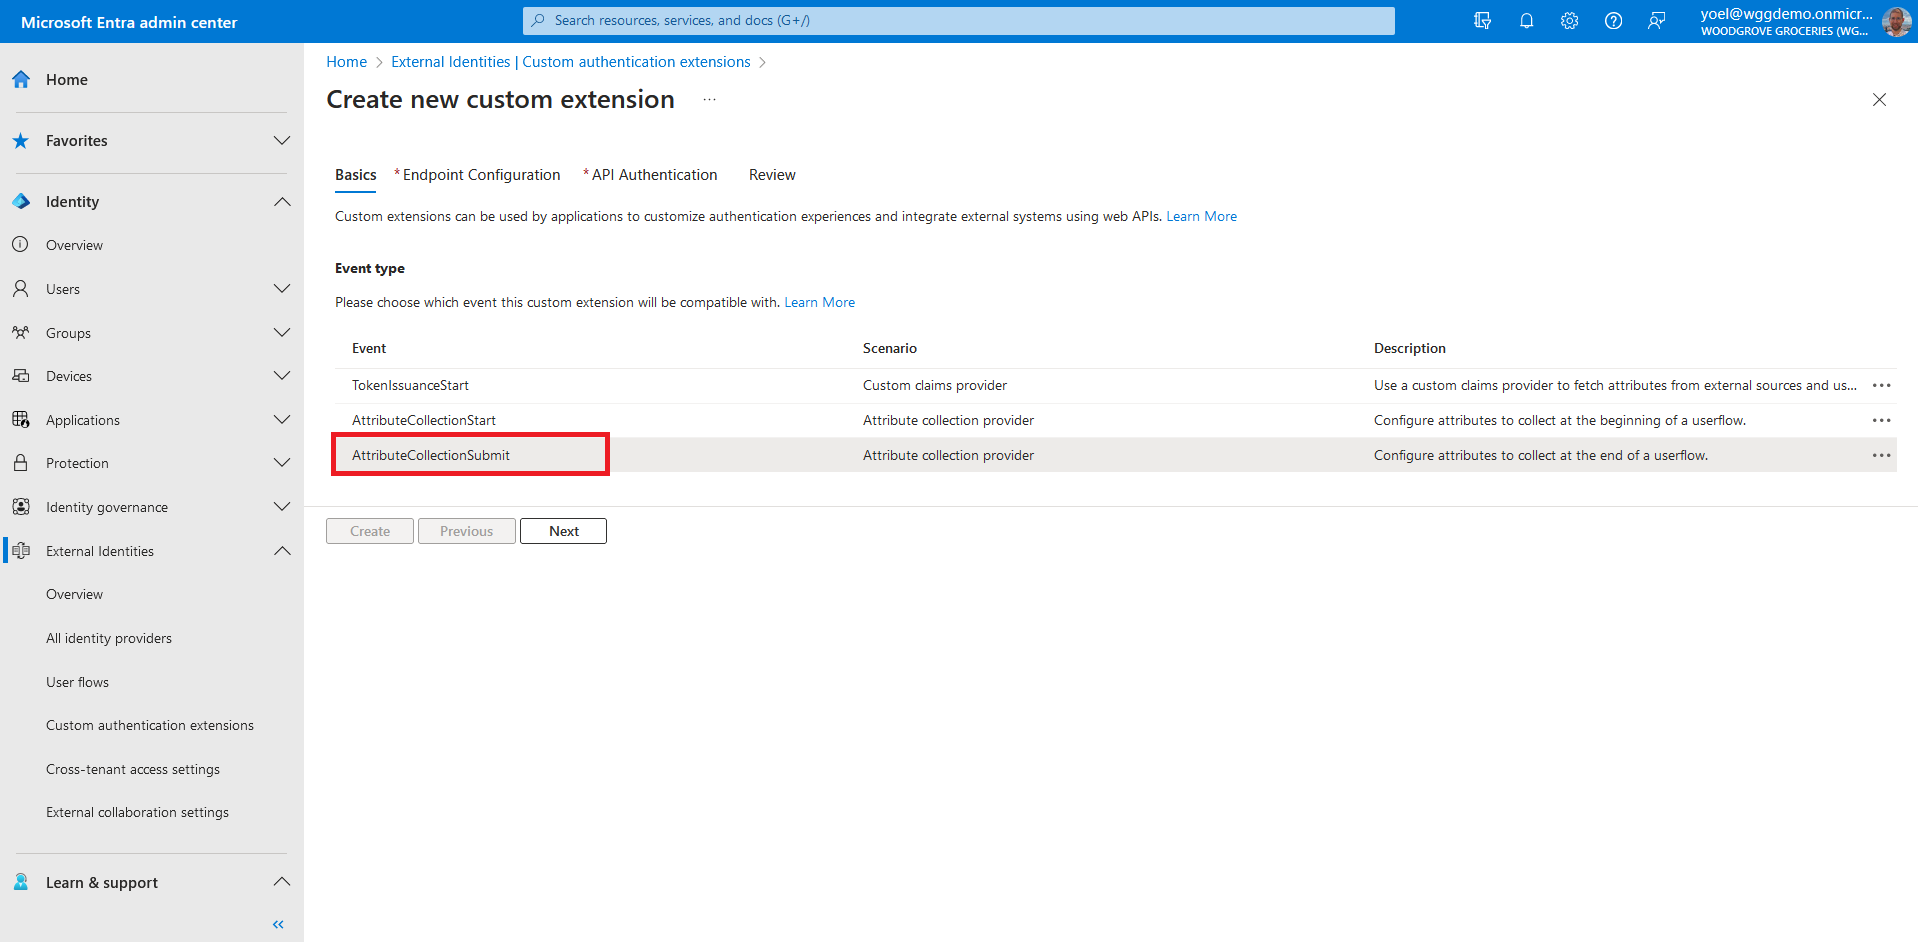
In Basics, select the AttributeCollectionSubmit event, and then select Next.
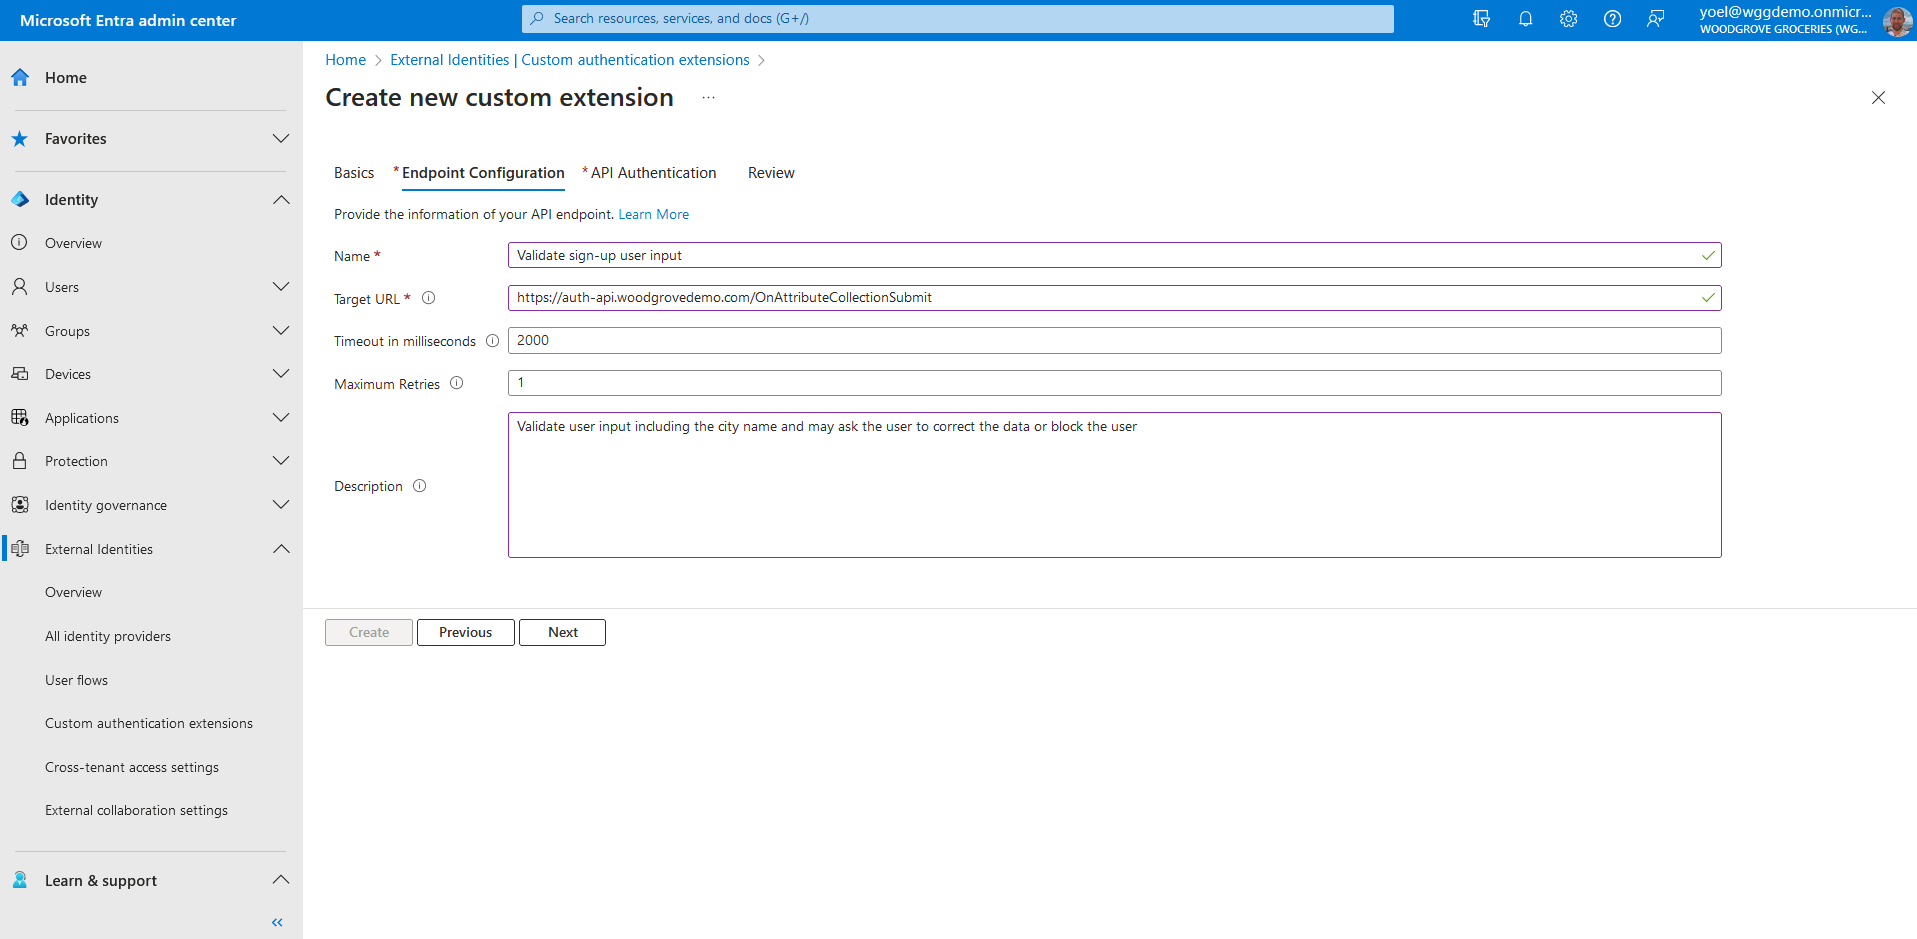
In Endpoint Configuration, fill in the following properties:
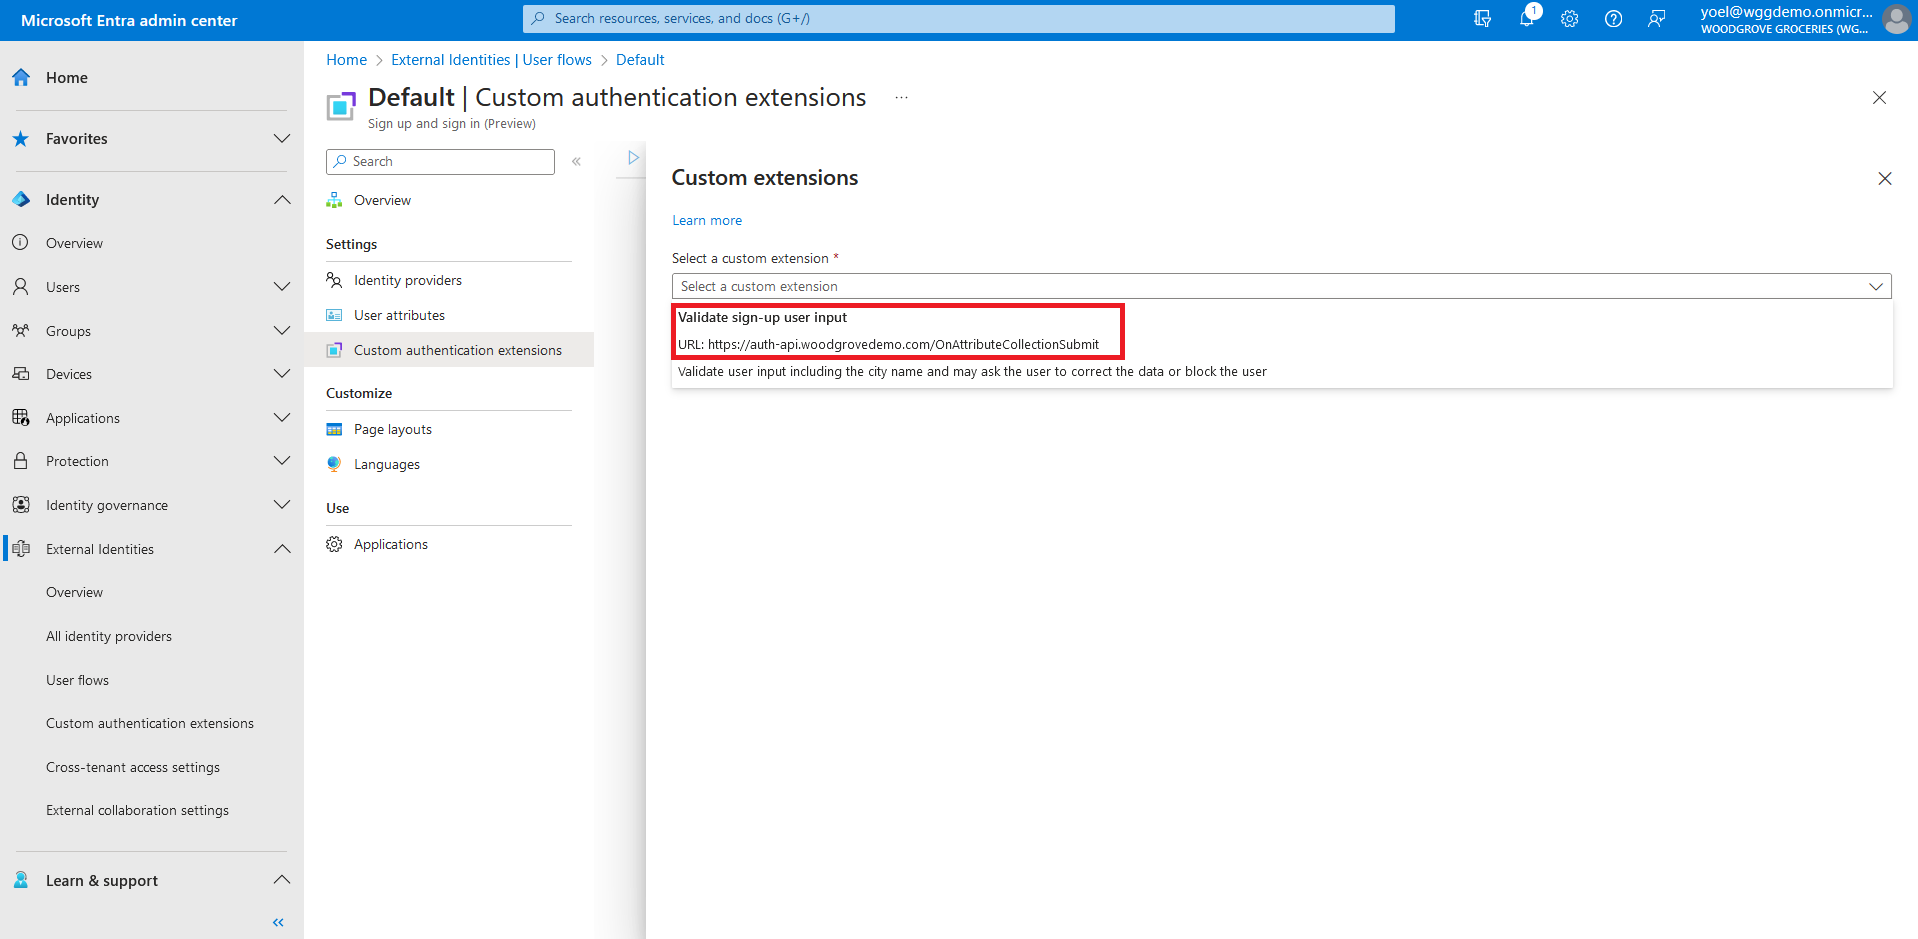
- Name - A name for your custom authentication extension. For example, Validate sign-up user input.
- Target URL - The URL of your REST API.
- Timeout in milliseconds - The maximum number of retries the API endpoint will be called in case of failure. If empty, will default to service default.
- Maximum Retries - The maximum number of retries the API endpoint will be called in case of failure. If empty, will default to service default..
- Description - A description for your custom authentication extensions.
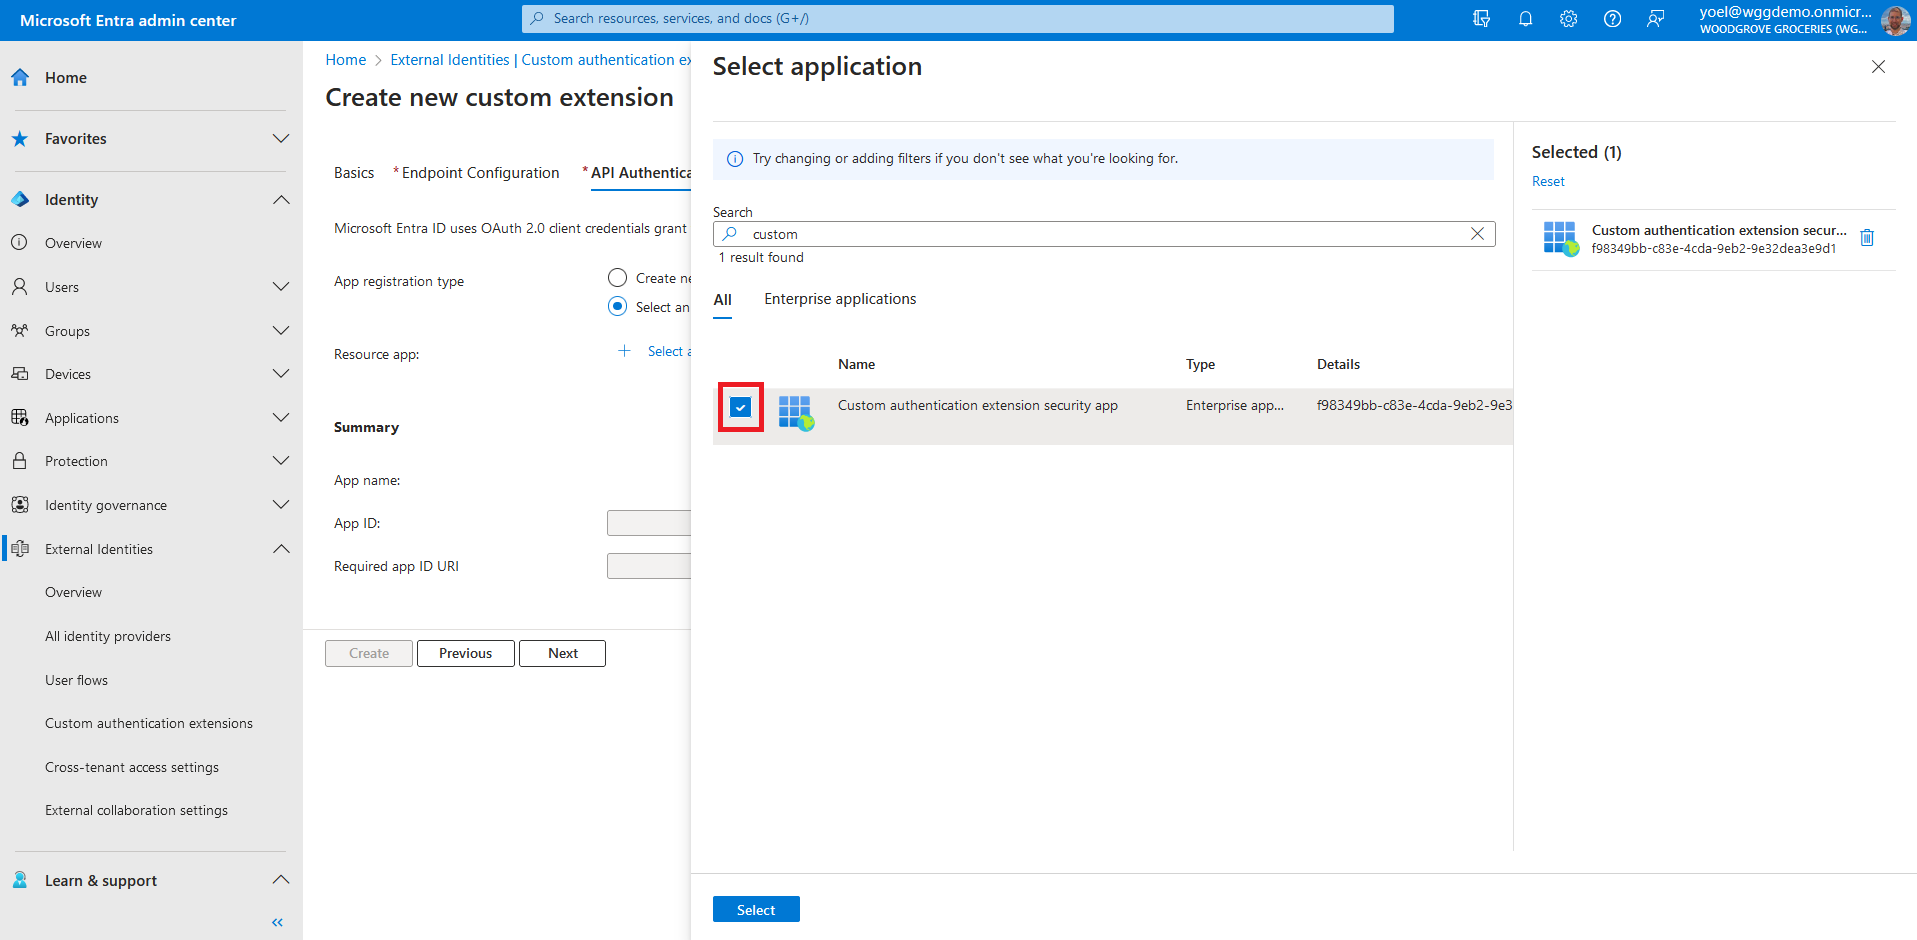
To ensure the communications between the custom authentication extension and your REST API are secured appropriately, multiple security controls must be applied. The first step is to create or choose an application that Microsoft Entra ID uses the OAuth 2.0 client credentials grant flow to secure the call to your API endpoint.
If this is your first custom authentication extension, see how we have configured our TokenIssuanceStart event. Since we already configured a custom authentication extension, in API Authentication, choose the Select an existing app registration in this directory option.
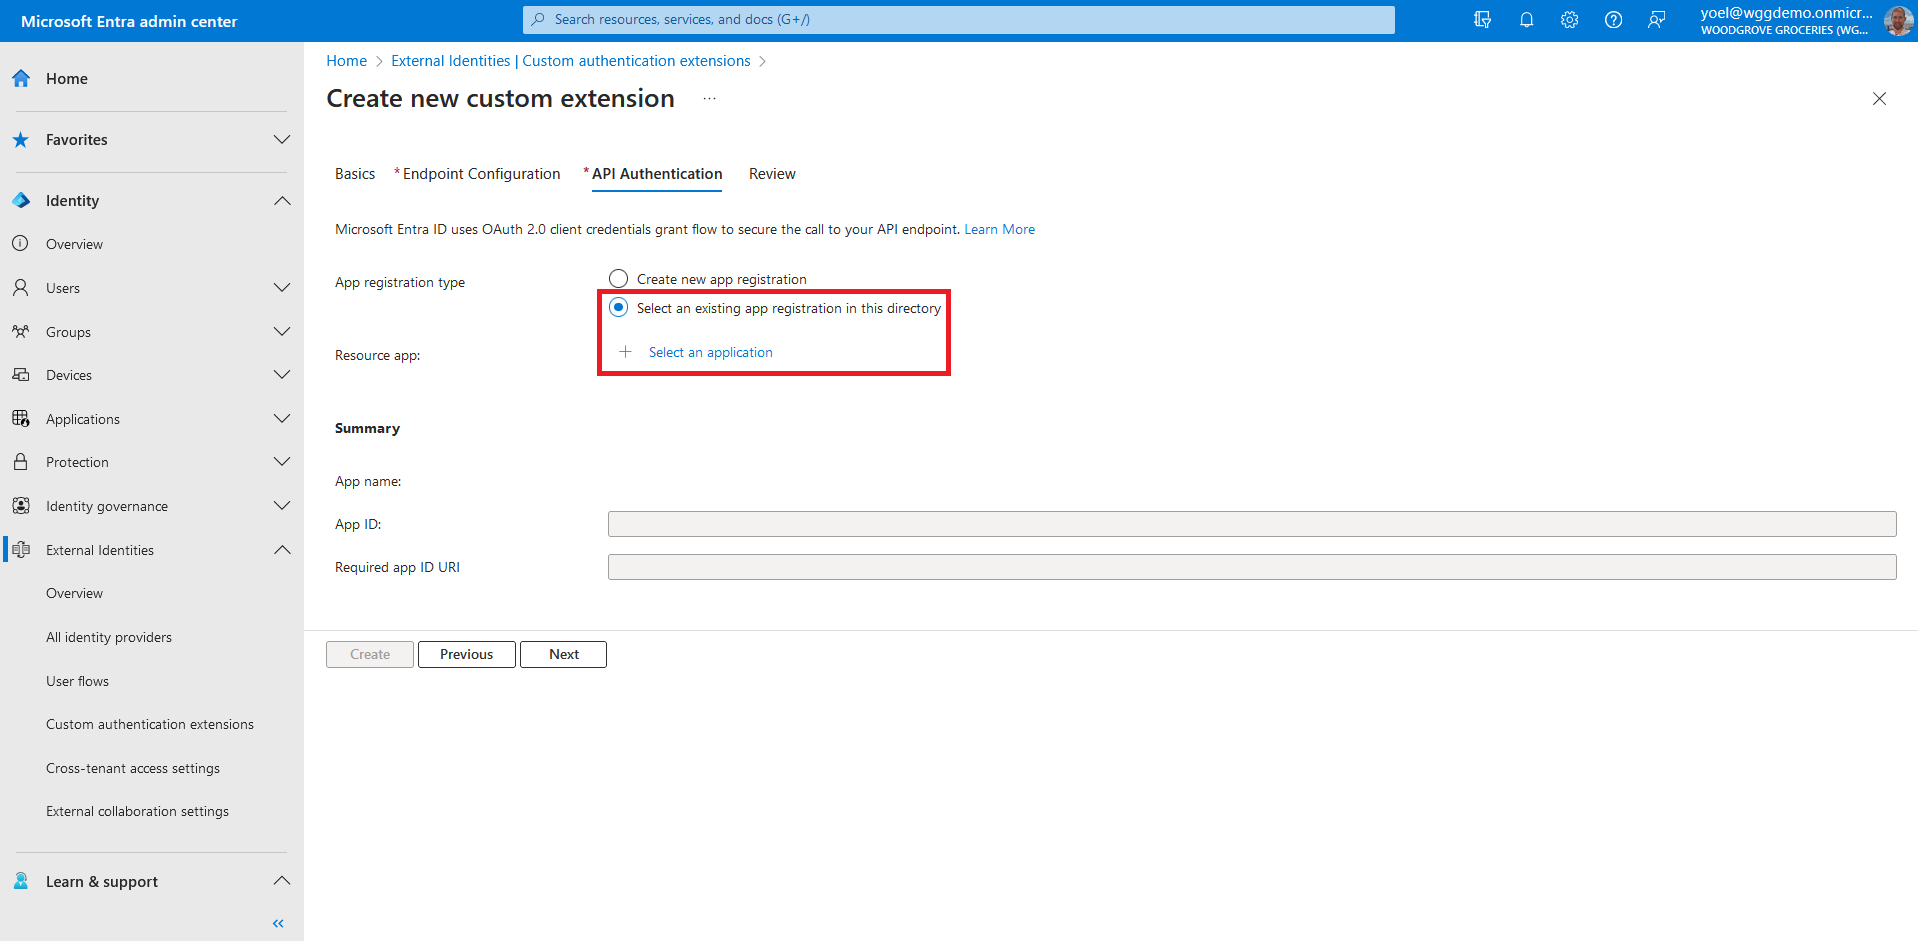
Select the application you configured for the other custom authentication extensions, and choose Select.
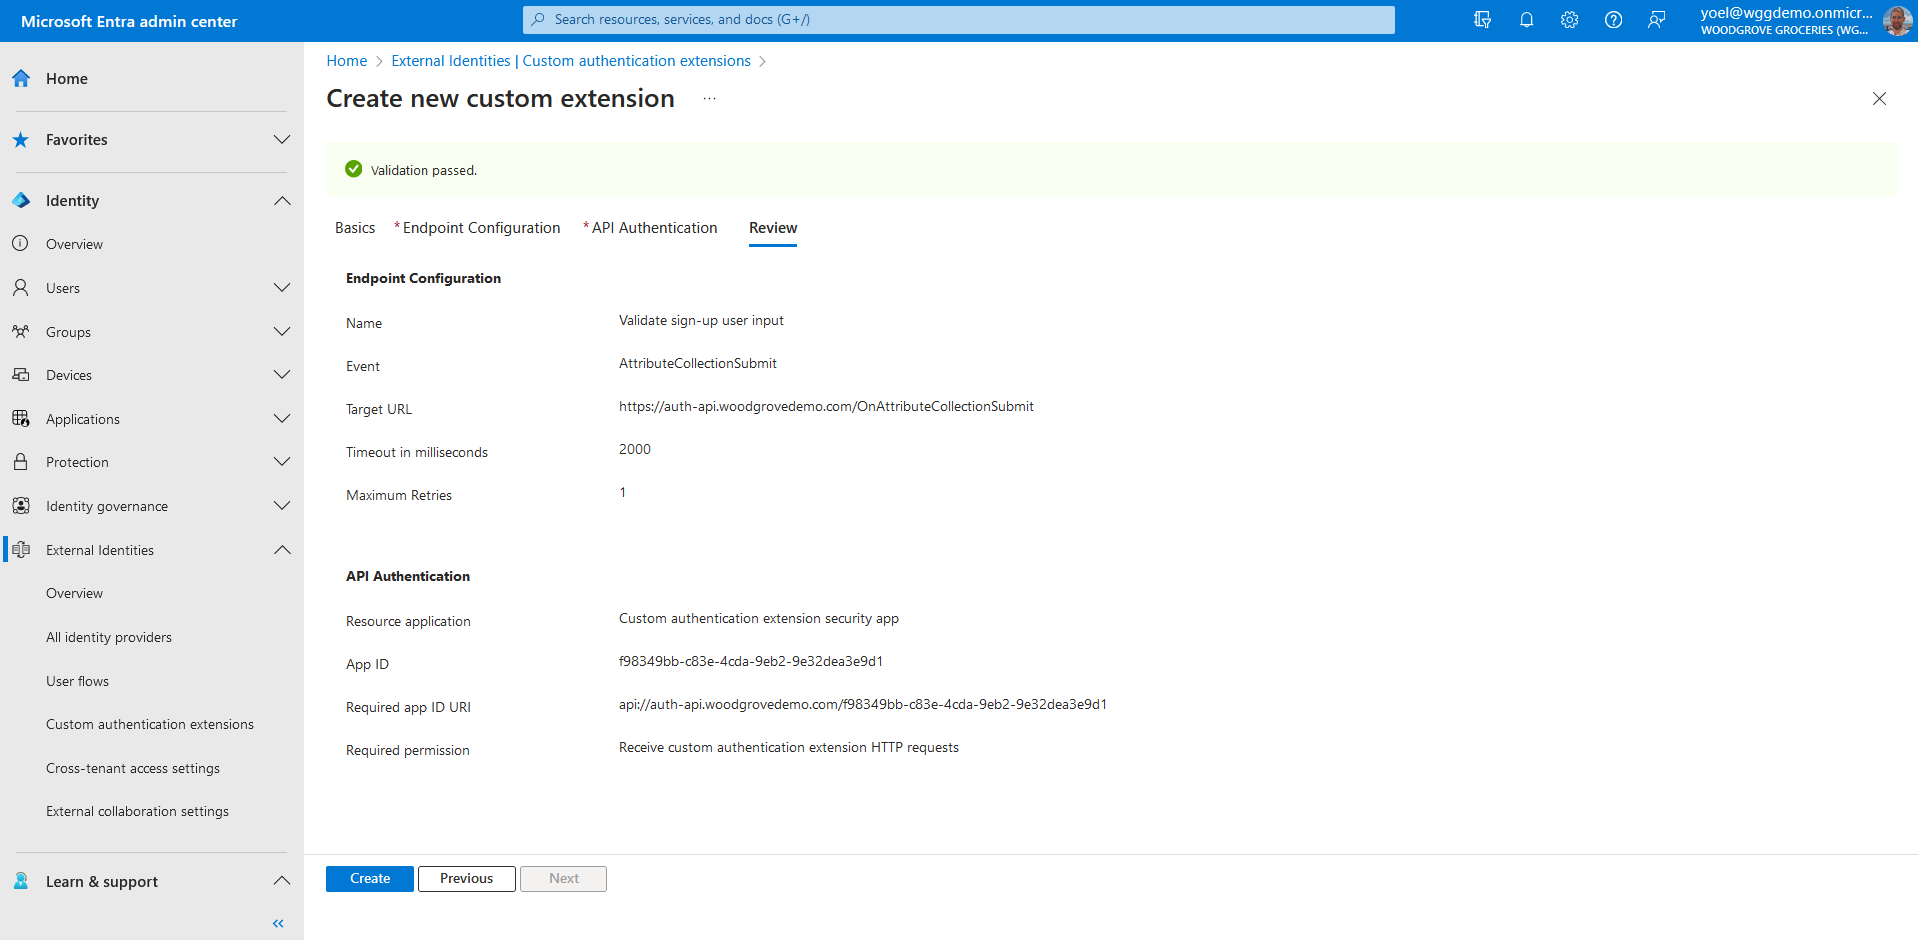
Review your configuration and select Create, which registers the custom authentication extension and the associated application registration you selected.
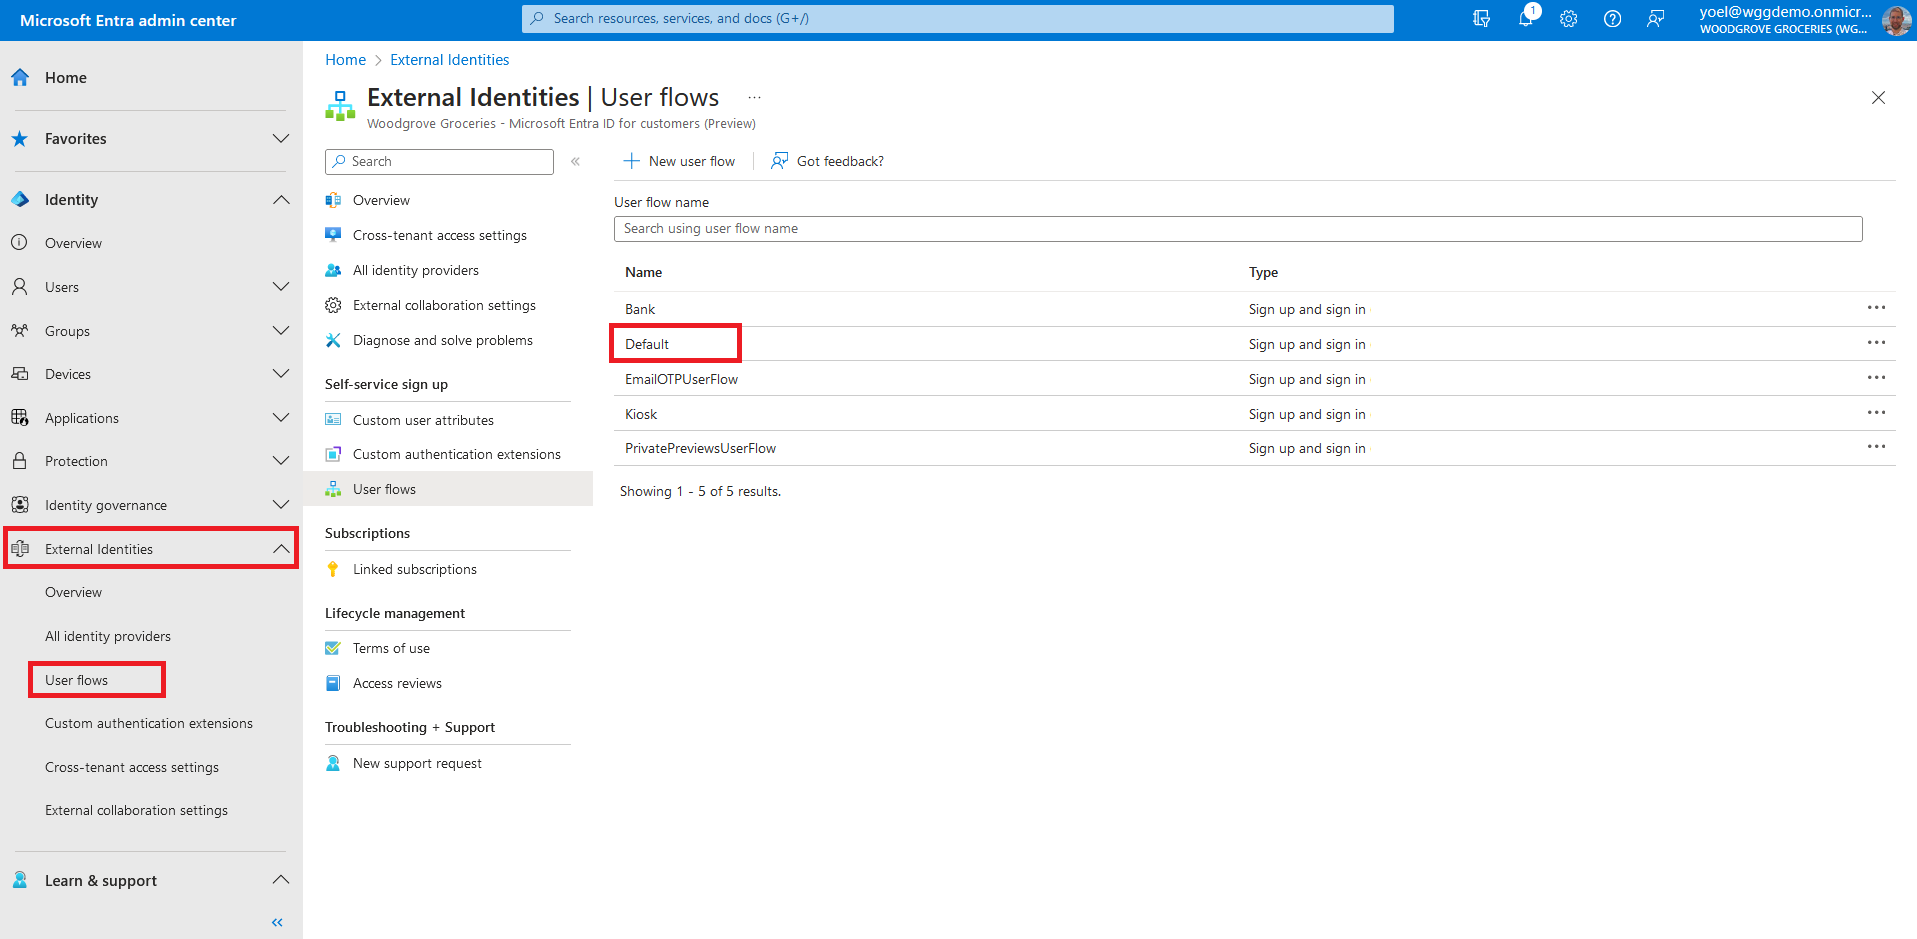
At this point the custom authenticate extension is configured in your tenant, but not in used in any of the sign-up pages. Next you associate the custom authentication extension with one or more of your user flows. To do so, browse to Identity > External Identities > User flows. Then, select the user flow from the list.
From the menu, select Custom authentication extensions. To associate your custom authentication extension, select the Before collecting information from the user event.
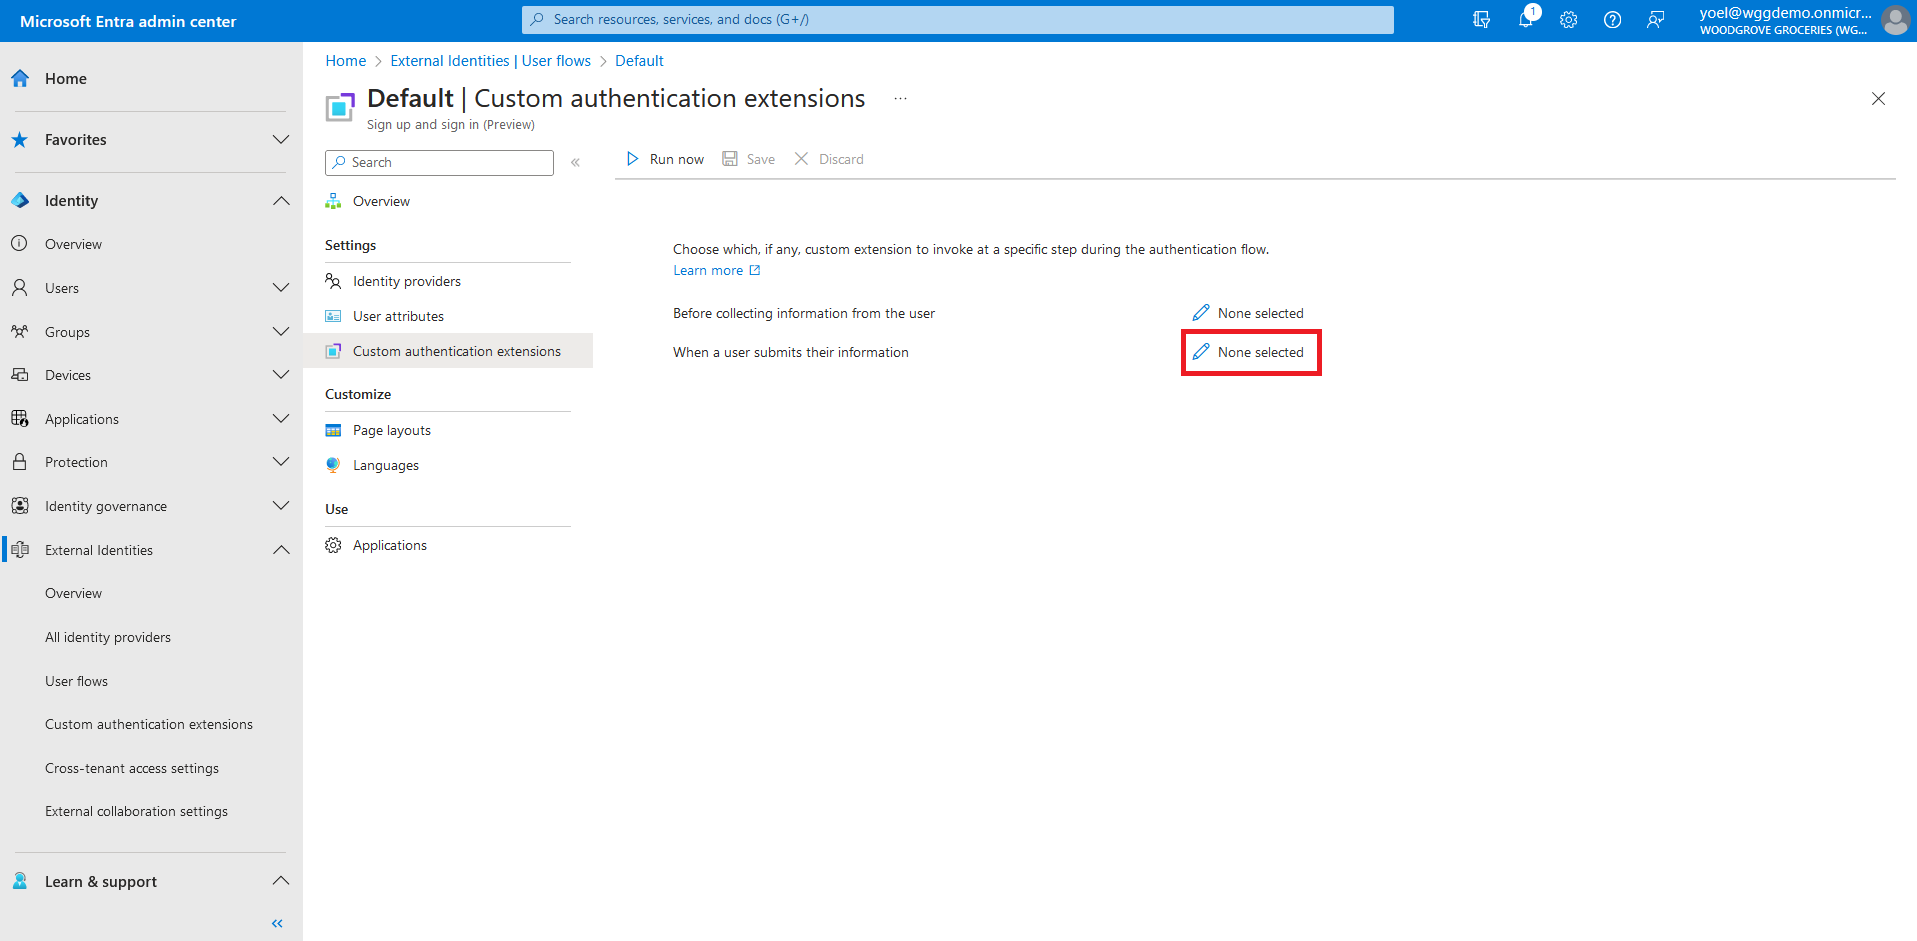
The custom extensions configured for the OnAttributeCollectionStart event will be displayed. Select one of them for the attribute collection start event, and then choose Select and then save the changes.
Well done!
You created a custom authentication extension type of OnAttributeCollectionSubmit. Then you associated it with your user flow. To check the user experience, sign-up to your application.
1. Register custom authentication extension application
If this is your first custom authentication extension, register the custom authentication extension application..
2. Register custom authentication extension
Next, you register the custom authentication extension. You register the custom authentication extension by associating it with the Custom authentication extension security app you created, and to your REST API endpoint. Replace:
- {app-ID} with the app ID from the previous call Custom authentication extension security app.
- {REST-API-domain} with your rest API domain name
- {Endpoint-URL} - with the RUL of your REST API endpoint
POST https://graph.microsoft.com/beta/identity/customAuthenticationExtensions
{
    "@odata.type": "#microsoft.graph.onAttributeCollectionSubmitCustomExtension",
    "displayName": "Validate sign-up user input",
    "description": "Validate user input including the city name and may ask the user to correct the data or block the user",
    "behaviorOnError": null,
    "authenticationConfiguration": {
        "@odata.type": "#microsoft.graph.azureAdTokenAuthentication",
        "resourceId": "api://{REST-API-domain}/{app-ID}"
    },
    "endpointConfiguration": {
        "@odata.type": "#microsoft.graph.httpRequestEndpoint",
        "targetUrl": "{Endpoint-URL}"
    },
    "clientConfiguration": {
        "timeoutInMilliseconds": null,
        "maximumRetries": null
    }
}
Show example
POST https://graph.microsoft.com/beta/identity/customAuthenticationExtensions
{
    "@odata.type": "#microsoft.graph.onAttributeCollectionSubmitCustomExtension",
    "displayName": "Validate sign-up user input",
    "description": "Validate user input including the city name and may ask the user to correct the data or block the user",
    "behaviorOnError": null,
    "authenticationConfiguration": {
        "@odata.type": "#microsoft.graph.azureAdTokenAuthentication",
        "resourceId": "api://auth-api.woodgrovedemo.com/12345678-1234-1234-1234-000000000000"
    },
    "endpointConfiguration": {
        "@odata.type": "#microsoft.graph.httpRequestEndpoint",
        "targetUrl": "https://auth-api.woodgrovedemo.com/OnAttributeCollectionSubmit"
    },
    "clientConfiguration": {
        "timeoutInMilliseconds": null,
        "maximumRetries": null
    }
}
2.1 Copy the custom authentication extension ID
From the response, copy the value of the id. For example:
{
    "@odata.context": "https://graph.microsoft.com/beta/$metadata#identity/customAuthenticationExtensions/$entity",
    "@odata.type": "#microsoft.graph.onAttributeCollectionStartCustomExtension",
    "id": "22222222-2222-3333-3333-444444444444",
    "displayName": "Prepopulate sign-up attributes",
    "description": "Prepopulate sign-up attributes from a REST API",
}
2.2 Link the custom authentication extension to a user flow
Update your user flow. In the next JSON, replace:
- {user-flow-ID} with your user flow ID.
- {Custom-auth-extension-ID} with the custom authentication extension you just created.
PUT https://graph.microsoft.com/beta/identity/authenticationEventsFlows/{user-flow-ID}/microsoft.graph.externalUsersSelfServiceSignUpEventsFlow/onAttributeCollectionSubmit/microsoft.graph.onAttributeCollectionSubmitCustomExtensionHandler/customExtension/$ref
{
    "@odata.id": "https://graph.microsoft.com/beta/identity/customAuthenticationExtensions/{Custom-auth-extension-ID}"
}
Show example
PUT https://graph.microsoft.com/beta//identity/authenticationEventsFlows/44444444-4444-4444-4444-445555555555/microsoft.graph.externalUsersSelfServiceSignUpEventsFlow/onAttributeCollectionSubmit/microsoft.graph.onAttributeCollectionSubmitCustomExtensionHandler/customExtension/$ref
{
    "@odata.id": "https://graph.microsoft.com/beta/identity/customAuthenticationExtensions/44444444-2222-3333-3333-444444444444"
}